How Should Press-On Nails Fit Bitten or Damaged Nail Beds?
Diagnose press-on fit on short bitten nail beds where limited plate area, skin contact, and curve mismatch make normal sizing unreliable.
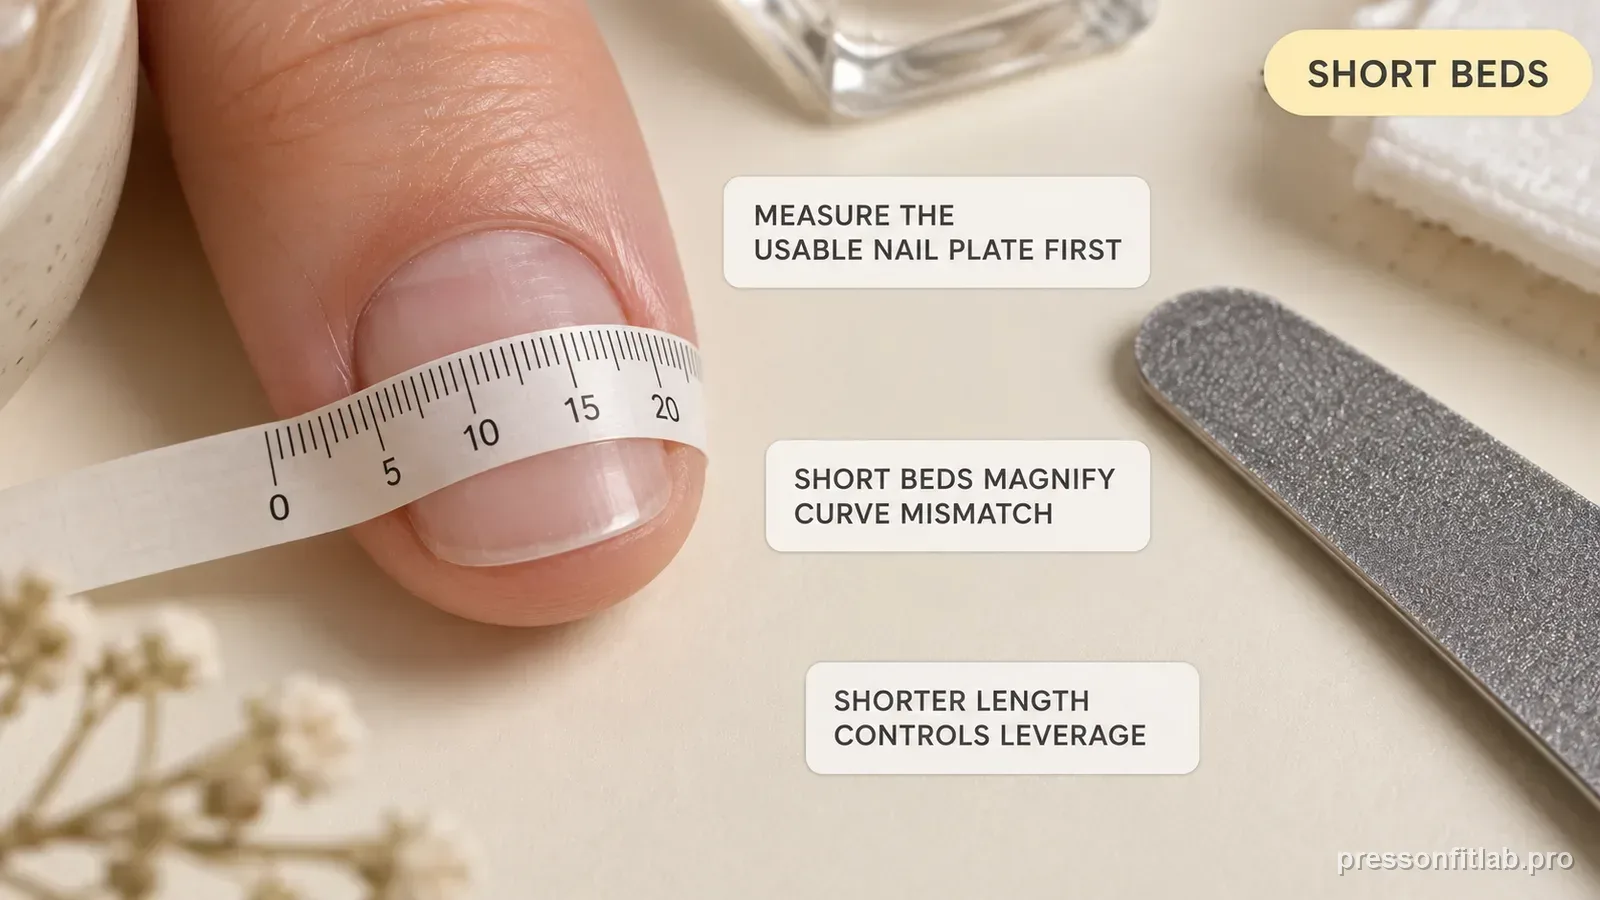
On a bitten nail, width is only part of the fit problem. The usable bonding area may be short, irregular, and crowded by exposed or puffy skin, so a shell that looks wide enough can still bond poorly. Prioritize contact with intact nail plate, zero skin overlap, neutral curve, and conservative length; do not cover raw, painful, draining, or infected-looking tissue.
Check these first
- ✓ Does the shell sit entirely on hard nail plate rather than surrounding skin?
- ✓ Can the center settle without either side springing upward?
- ✓ Is the nail plate intact rather than raw, bleeding, swollen, or draining?
- ✓ Is the artificial free edge long compared with the tiny bonded base?
- ✓ Are you sizing to the nail plate rather than the visible fingertip width?
Find the usable nail plate first
Nail biting can remove free edge and expose more fingertip skin, making the visible pink area misleading. Size to the hard nail plate boundary, not to the full fingertip outline. A shell resting on skin may seem secure while held down but cannot create continuous nail-to-shell contact.
A useful boundary test is to trace the hard plate with the tip of a wooden cuticle stick while the finger is relaxed. If the apparent sidewall moves or compresses when touched, that margin is skin, not extra bonding area. This matters because adhesive squeezed onto living skin does not add stable plate contact and increases irritation risk.
Short beds magnify curve mismatch
On a short plate, a small central or side gap can consume a large share of the available bonding area. Dry-fit from the free-edge view and reject a shell that rocks, bridges the center, or requires continuous side pressure to stay seated.
Short bitten plates also make fore-aft fit important. A shell can span the width correctly yet have a cuticle edge that consumes too much of the available plate, leaving only a narrow central zone carrying the bond. Compare shells not only by side-to-side width but by how much uninterrupted plate they actually cover from cuticle margin toward the fingertip.
Keep adhesive off damaged skin
Application instructions for press-ons warn against placing the artificial nail on skin. This is especially important when biting has left torn cuticles or exposed lateral skin. Excess glue that repeatedly squeezes out is evidence to re-check size and dose, not a reason to tolerate skin exposure.
Do not use adhesive thickness as a substitute for missing plate area. A thick puddle can temporarily fill voids, but it also makes alignment less predictable and increases squeeze-out. Glamnetic's application instructions emphasize thin, even glue and avoiding skin contact, which is especially relevant when the visible plate is very small.
Control leverage with shorter length
A very long shell on a very short natural plate creates a large lever relative to the bonded footprint. For troubleshooting, establish a stable short or medium fit first, then add length only after the base contact is proven.
The practical ratio to watch is unsupported extension versus bonded plate length. You do not need to calculate a formal number: simply compare a short and long shell on the same finger. If the longer option projects far beyond a tiny plate, every accidental tap has more opportunity to peel the shell from its base.
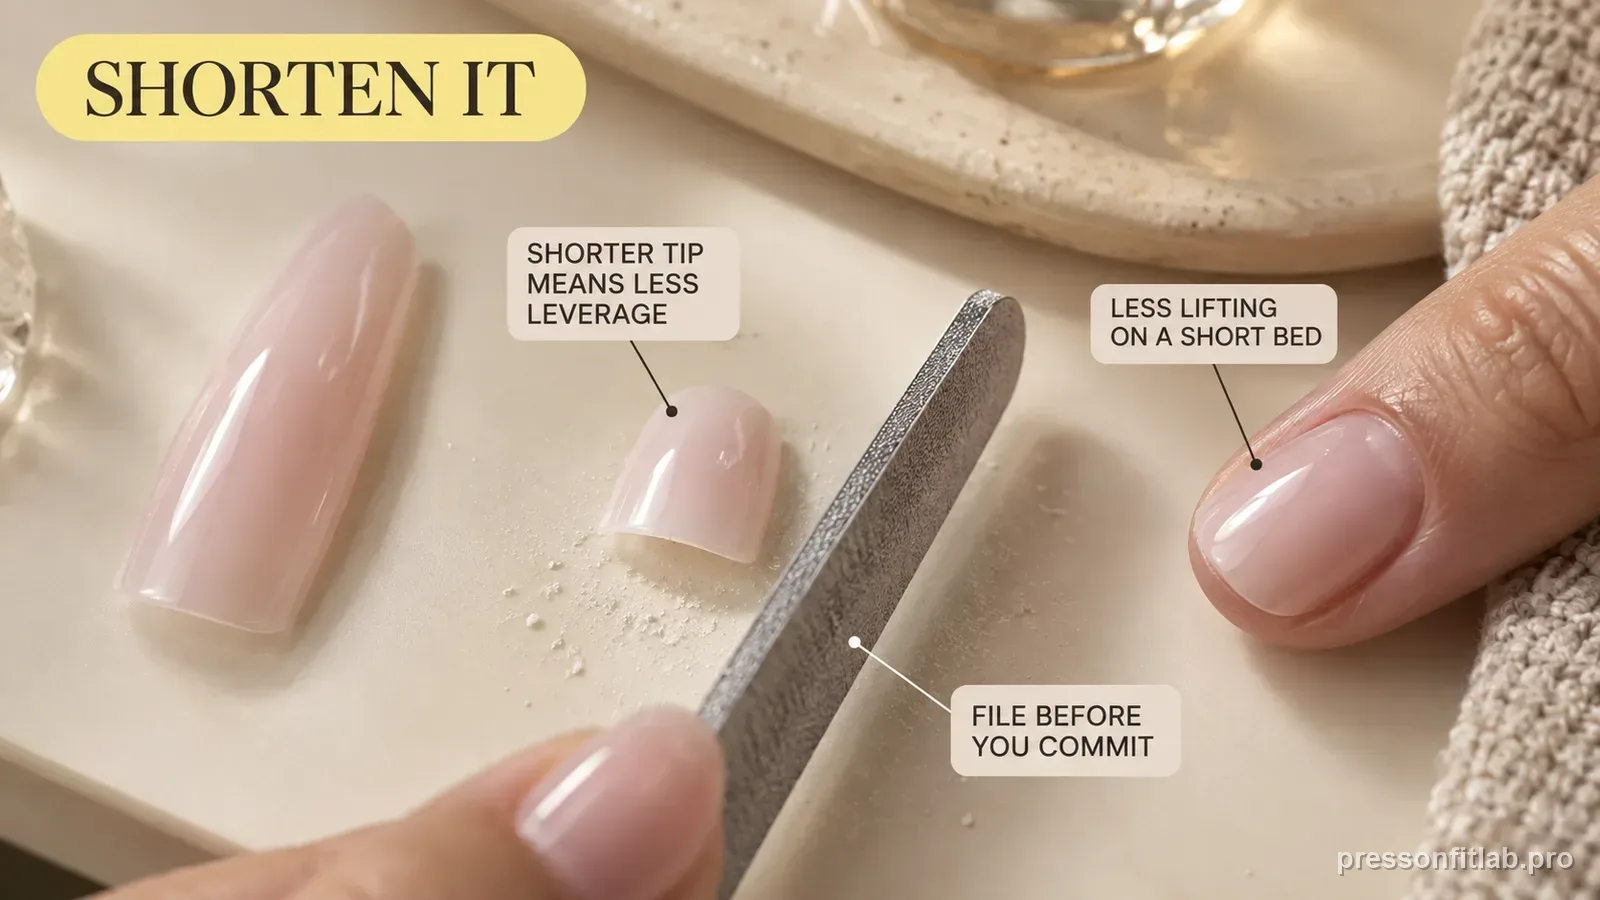
Modify the artificial shell, not injured tissue
Small sidewall or cuticle-edge corrections can be made to the artificial nail when the rest of the fit is sound. Do not thin, dig into, or aggressively file a compromised natural nail merely to force a stock shell to fit.
When the free edge has been bitten below the fingertip, there may be no safe artificial edge to tuck underneath or ‘anchor’ against. The press-on should sit on top of intact nail plate only. Trying to hook the shell under swollen fingertip skin changes the contact from nail-to-shell to skin-to-shell and is a reason to stop that fit attempt.
Know when fit troubleshooting should stop
Nail biting can damage the nail and surrounding tissue. If there is significant pain, redness, swelling, drainage, separation, or unexplained dark or green discoloration, leave the nail uncovered and address the health issue before another press-on application.
The health gate should stay strict even when the cosmetic reason for covering the nail is understandable. DermNet describes nail biting as capable of damaging both the plate and surrounding soft tissue. If the tissue is actively injured, the correct diagnostic conclusion is not ‘use a gentler glue’; it is ‘there is not currently a suitable bonding surface.’
Diagnostic table
| What you see | What it suggests | Next check |
|---|---|---|
| Looks wide enough but rests on skin | Visible fingertip is being mistaken for usable plate | Size to hard nail plate only and refine the artificial edge |
| Shell rocks when center is pressed | Curve mismatch on a short bonding area | Try a different curvature or more flexible shell |
| Pops after light taps | Too much free-edge leverage for the bonded base | Test a shorter length |
| Glue repeatedly reaches sore skin | Oversized shell or excess adhesive | Refit and reduce excess product |
| Pain, drainage, redness, or separation | Possible injury or nail disorder | Stop artificial coverage and seek appropriate evaluation |
A controlled test plan
- 1
Photograph the actual plate boundary before sizing.
- 2
Dry-fit two neighboring sizes and reject any that touch skin before full plate contact.
- 3
Test the better shell in a short length with the same prep and adhesive.
- 4
If it lifts, record whether the first failure is cuticle, sidewall, center, or free edge.
- 5
Change only width, curve, or length based on that failure location.
What not to do
- Choosing a shell wide enough to cover fingertip skin
- Applying glue onto raw or inflamed tissue
- Filling a large curvature gap with extra glue
- Starting troubleshooting with extra-long tips
- Aggressively filing damaged natural nail tissue
Worked troubleshooting example
Maya chose a shell that visually covered her bitten index finger, but it popped off twice in one day. A dry fit showed that both lower sides were actually resting on exposed fingertip skin.
She tried a slightly smaller, flatter shell that contacted only intact nail plate and shortened the free edge. She kept her usual preparation and glue so the fit change was the only major variable.
The repeated popping stopped, showing that the failure had been skin interference plus leverage rather than simply weak adhesive.
Field notes
Bitten nails often look like a width problem from above, but the side view frequently reveals that usable contact length and curve are the limiting variables.
A conservative short shell that sits quietly without being held down is a better diagnostic baseline than a fashionable long shell forced onto a small plate.
Frequently asked questions
Can press-ons help me stop biting my nails?
A physical covering may reduce access for some people, but it does not treat the biting habit. Do not glue artificial nails over open, inflamed, or infected-looking tissue.
Should I size up when a bitten nail is between sizes?
Only if the larger shell can be refined to contact nail plate without skin overlap. A different curve can matter more than the nominal size.
Are adhesive tabs better than glue on bitten nails?
Tabs may reduce liquid-glue exposure, but they still require intact nail plate and must not bridge onto damaged skin.
Sources checked
Sources below are page-specific. We prioritize manufacturer directions for product-specific steps and use medical or dermatology guidance when a safety question requires it. Always follow the instructions for the exact adhesive or set you own.