Air Bubbles Under Press-On Nails: Causes and Fixes
Troubleshoot visible air pockets under press-ons by checking tip curvature, application angle, adhesive spread, and pressure.
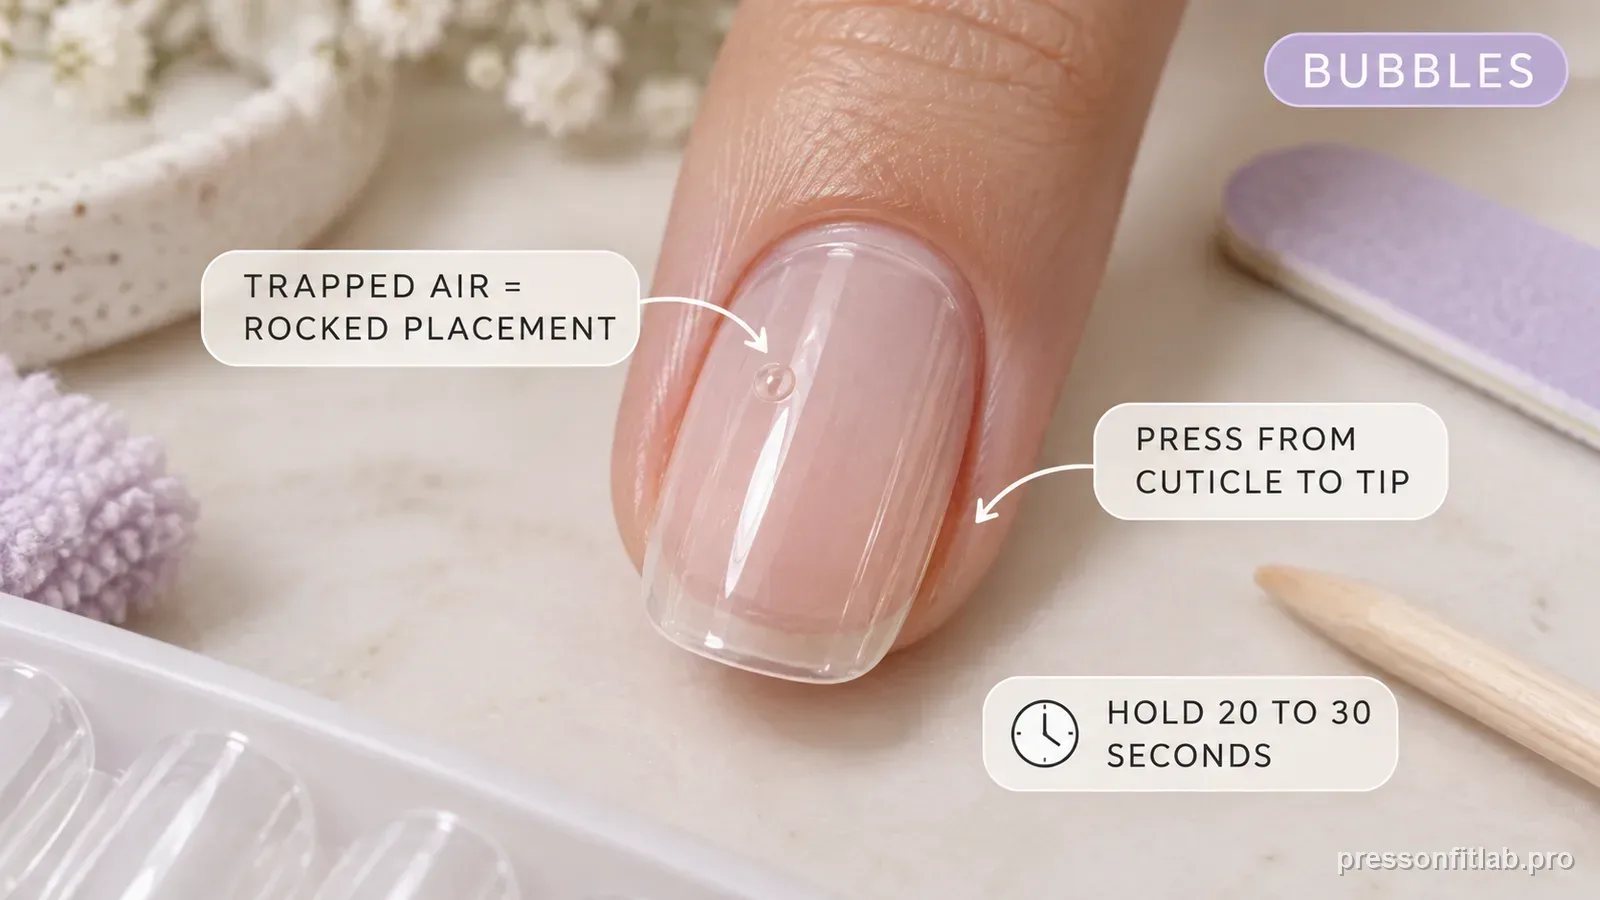
Air pockets can come from a profile mismatch, uneven adhesive coverage, or trapped air during placement. Dry-fit first. If the dry fit is stable, follow the exact product’s placement and pressure method rather than relying on one universal application angle.
Check these first
- ✓ No obvious hollow gap before glue.
- ✓ Adhesive spread is even.
- ✓ Use the product-specified placement motion.
- ✓ Pressure reaches the entire nail.
Check whether the bubble exists before adhesive
Hold the clear or light-colored tip over the nail. If you can already see a large hollow zone when the center or sides touch, you are looking at a fit problem rather than an application bubble.
Choose a different curve or size before proceeding.
Use the product’s placement method consistently
Once the dry fit is stable, follow the placement angle, alignment, and hold method specified for the exact press-on or adhesive system. The goal is to bring the intended contact surfaces together without sliding the tip onto skin or trapping a large pocket. Do not assume one cuticle-to-free-edge motion is required by every brand.
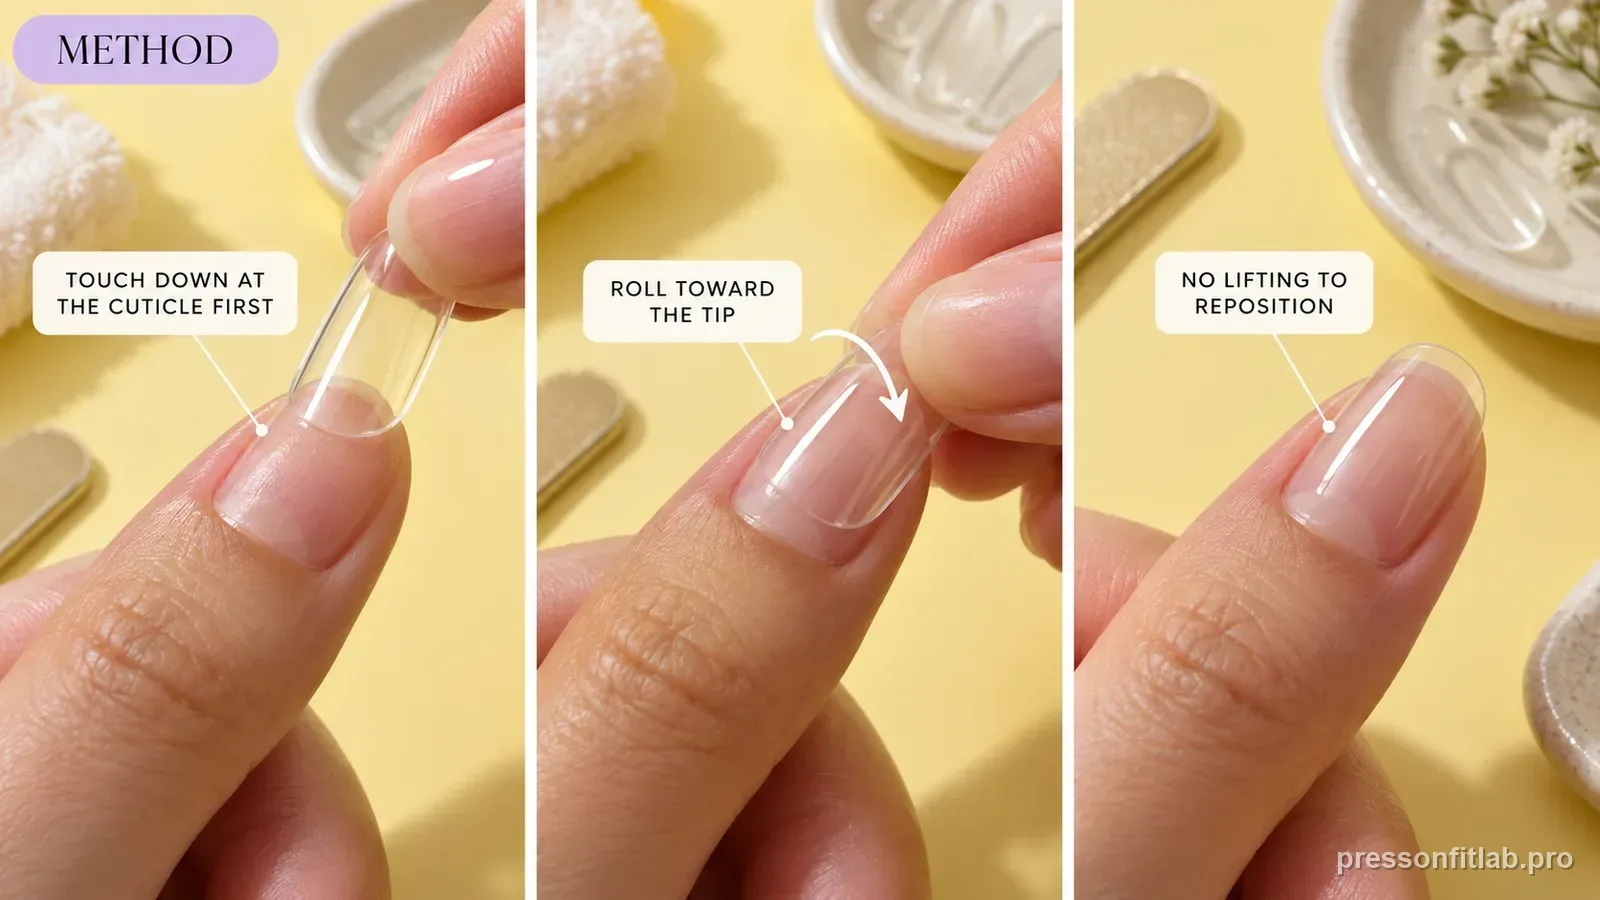
Spread pressure across the whole surface
Pressing only in the center can leave edges under-compressed. Apply firm, even pressure according to the adhesive instructions, paying attention to the side zones.
Do not use painful force to flatten a mismatched tip.
If a bubble remains
Do not repeatedly lift and reseat a partially bonded nail unless the product directions support that action. A contaminated or partly cured bond may perform unpredictably.
It is usually cleaner to remove and reapply the nail correctly according to the adhesive removal and application instructions.
Use bubble location as a diagnostic map
A bubble near the cuticle can accompany placement that sits too high, a base-shape mismatch, or incomplete contact near the base. A bubble along one side can accompany off-center placement, width mismatch, or profile mismatch. A persistent center pocket that already appears during dry fit points more strongly toward unstable profile/contact than application timing. Take a quick photo before removal if the nail is transparent enough to show the pocket. On the retry, compare whether the bubble returns in the same location. Repeated location is evidence; a random new location makes application motion or coverage more plausible.
Do not chase a bubble by pressing harder
Harder pressure can temporarily hide a pocket while increasing sliding or squeezing adhesive toward the perimeter. The better response is to identify whether the gap existed before glue, then correct profile or placement accordingly. A tip that needs continuous force to keep a bubble closed is not demonstrating stable contact; it is demonstrating that the underlying cause has not been isolated.
Diagnostic table
| What you see | What it suggests | Next check |
|---|---|---|
| Bubble visible during dry fit | Profile/contact mismatch or unstable fit | Compare width, curve, and contact before adhesive. |
| Bubble appears only during placement | Placement or adhesive-contact issue is more plausible | Repeat the exact product method with stable alignment and even pressure. |
| Many tiny dry spots | Coverage may be uneven | Use the product’s recommended even adhesive layer. |
| Bubble always on same finger | Finger-specific profile mismatch | Fit that nail separately. |
| Bubble plus side lift | Width/curve issue likely | Solve fit rather than repeatedly adding glue. |
A controlled test plan
- 1
Dry-fit the press-on and confirm it is stable without adhesive.
- 2
Follow the exact product’s placement angle, motion, pressure, and hold instructions.
- 3
Inspect whether adhesive coverage reaches the intended bonding area without flooding the perimeter.
- 4
Apply one test nail without sliding or re-seating it after contact begins.
- 5
If an air pocket repeats in the same place, compare tip profile and contact before adding more adhesive.
What not to do
- Assuming every bubble means not enough glue.
- Using a placement motion that conflicts with the exact product directions.
- Lifting and reseating partly cured glue repeatedly.
- Using painful force to squeeze a curve mismatch flat.
Worked troubleshooting example
Example: a clear press-on shows a bubble near the center immediately after you lower it onto the nail. When you remove the failed nail safely and dry-fit it again, no center gap is visible before adhesive, so the bubble likely formed during placement rather than from a large curve mismatch.
On the next attempt you rehearse the placement first, then follow that product’s specified angle, motion, pressure, and hold steps without improvising a different sequence. The same tip seats without the visible pocket, while all other variables stay unchanged.
If the hollow area had already appeared during dry fit, the better test would have been a different profile. A bubble that begins before glue and a bubble that appears during glue placement are two different clues.
Field notes
A bubble that is already present before adhesive strongly points toward fit/contact geometry, while a bubble that appears only during application makes placement or coverage more plausible. Neither timing pattern proves one exact cause, but separating them narrows the next test.
Clear or translucent tips make dry-fit gaps easiest to see, but the rocking test works on opaque nails too. If the tip pivots around one contact point, it is not fully matched even if the top-view width looks perfect.
Frequently asked questions
Are air bubbles under press-ons bad?
They indicate incomplete contact and can shorten wear. Refit or reapply rather than ignoring a large gap.
Why is the bubble always in the center?
A repeat center pocket can indicate unstable profile contact if it is already visible during dry fit, or it can come from placement or coverage if it appears only after adhesive is added. Compare the dry fit first instead of assigning one curve direction from bubble location alone.
Can I press an air bubble out after the glue sets?
Once the adhesive has set, forcing the tip may not create a reliable bond. Follow the product removal and reapplication directions.
Sources checked
Sources below are page-specific. We prioritize manufacturer directions for product-specific steps and use medical or dermatology guidance when a safety question requires it. Always follow the instructions for the exact adhesive or set you own.