How Much Nail Glue Should You Use for Press-Ons?
Use enough glue for complete contact without flooding the sidewalls. Learn how fit, nail size, and glue viscosity change the amount you need.
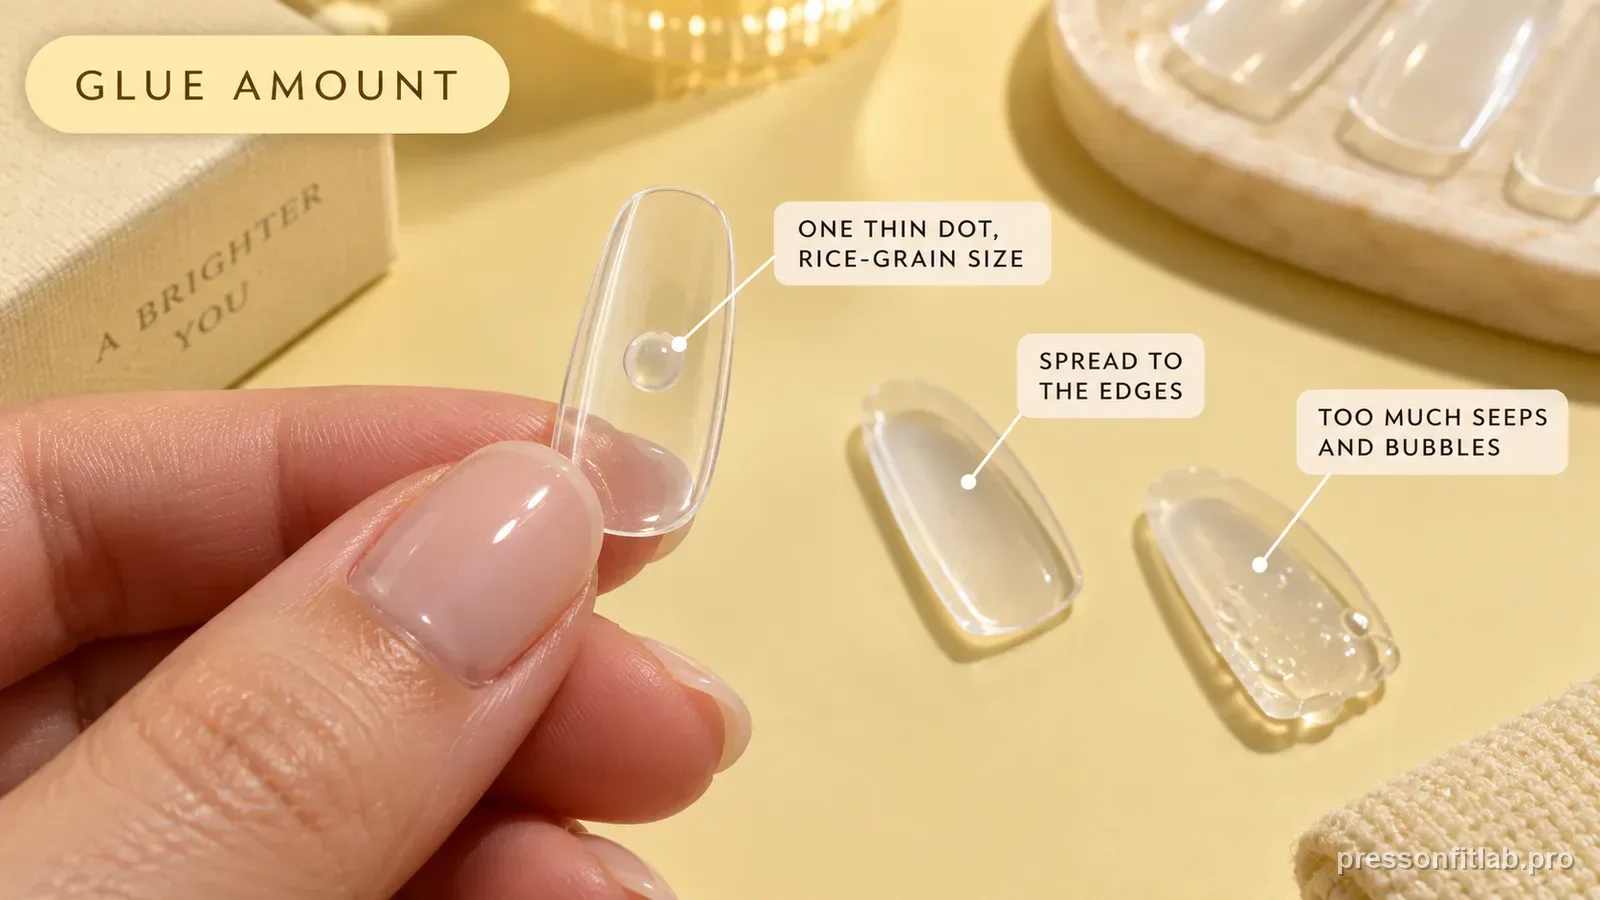
Use the amount recommended by your glue manufacturer, aiming for a thin, complete bond across the contact area rather than a large puddle. A good fit usually needs less gap-filling than a poor fit, and excess glue that squeezes onto skin is a sign to stop and clean up according to the product directions.
Check these first
- ✓ Manufacturer directions first.
- ✓ Full but controlled contact area.
- ✓ No glue flooding skin.
- ✓ Adjust amount by nail size and fit.
There is no universal drop count
Glues differ in bottle tip, viscosity, cure behavior, and instructions. A fixed number of drops is less reliable than following the product guidance and watching for complete coverage.
A thumbnail naturally has a larger contact area than a pinky, so identical amounts on every finger can underfill one nail and overfill another.
What too little looks like
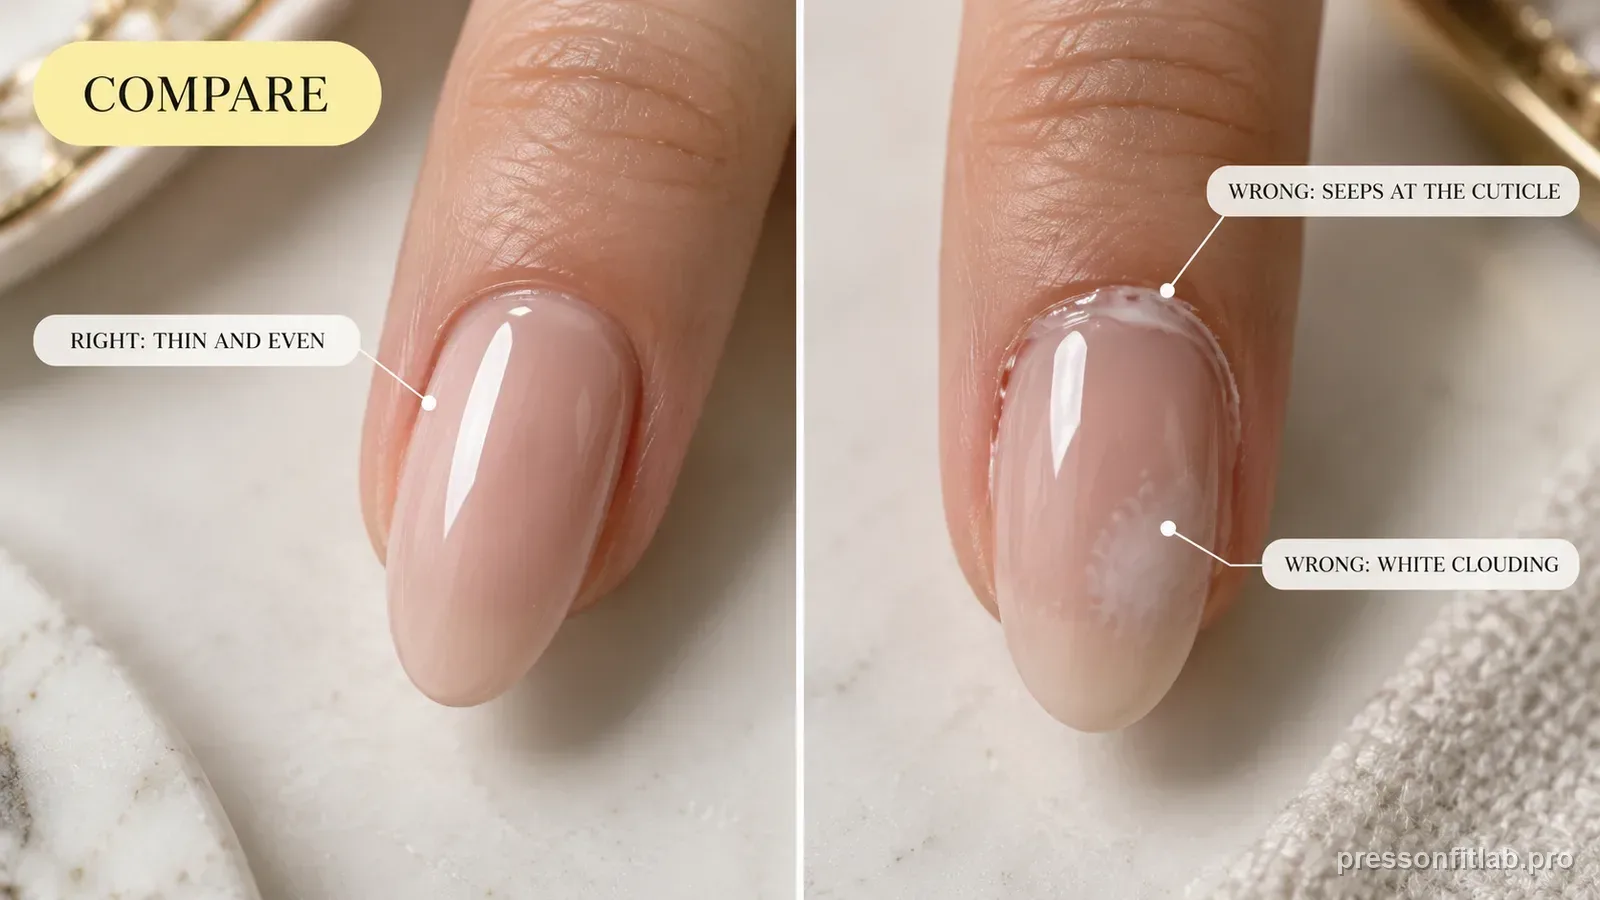
Dry patches or obvious air pockets can mean the adhesive did not cover the full contact zone. Lifting may begin at the unbonded area and expand with normal wear.
Before increasing glue, verify that the press-on itself sits flush. A shape gap can look like an adhesive shortage.
What too much looks like
Glue squeezing out onto skin, a tip sliding around during placement, or a thick uneven layer suggests too much. Wipe or remove excess only according to the adhesive instructions and avoid bonding skin.
More adhesive is not a substitute for careful alignment.
Practice on one hand
When learning a new glue, fit all tips first and apply slowly. Compare how much coverage you get on small and large nails before moving quickly through the set.
Once you find a repeatable amount, record the product and technique rather than trying to remember from manicure to manicure.
Scale coverage to the finger instead of copying one drop size
A thumb and a pinky do not offer the same bonding surface. If the adhesive product describes coverage rather than an exact universal drop count, apply that coverage proportionally and evenly to each finger. Copying the same blob across all ten nails can create overflow on small nails and dry zones on larger ones.
Your best record is the contact result, not a remembered drop size. Note which fingers needed more careful edge coverage and which ones flooded easily so the next set starts with finger-specific control.
Do not use overflow as proof of a stronger bond
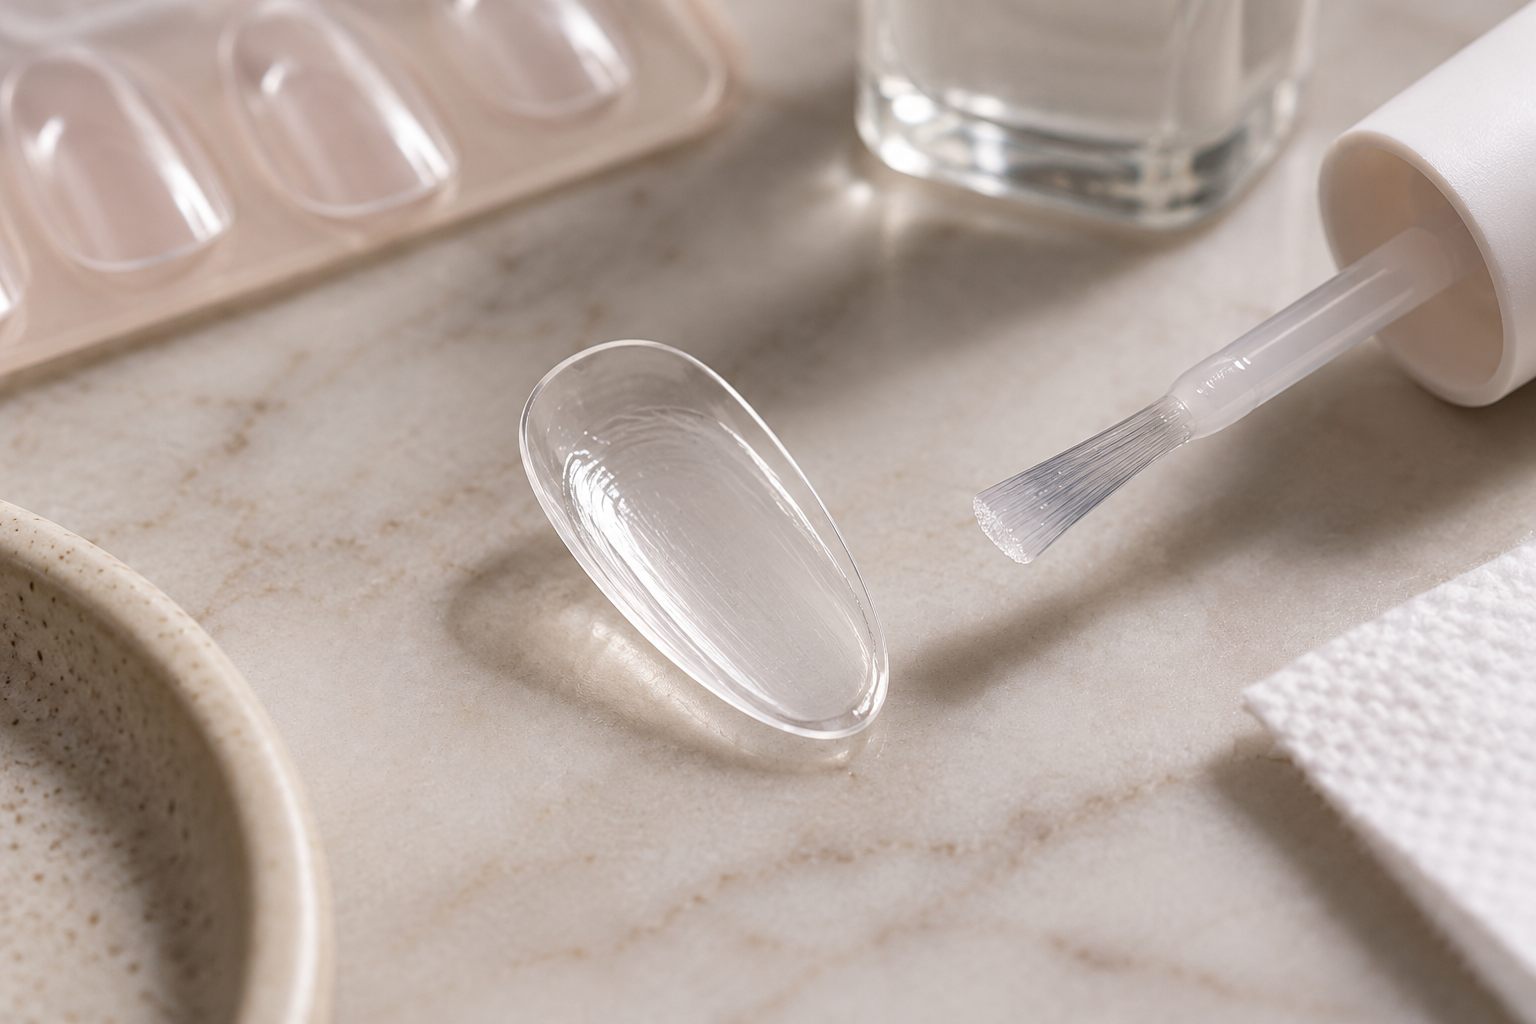
Visible squeeze-out only proves that adhesive left the bonding area. It does not prove that the center and sidewalls have better contact. Judge the application by fitted geometry, controlled coverage, clean skin boundaries, and the manufacturer’s method. A smaller finger with a large overflow ring may actually have less predictable contact because the tip slid while excess glue escaped.
Choose coverage by fit and the product instructions
Glue packages differ in viscosity, brush width, and application directions, so a fixed “one drop” or rice-grain measurement is not a dependable rule for every finger. Start with the amount and surfaces specified by the set or adhesive maker, then aim for even nail-to-tip contact without flooding the cuticle or surrounding skin.
If glue squeezes out, stop and clean only as directed on the label. Do not use extra glue to fill a rocking tip or force a narrow size to fit: choose a more compatible tip first. Skin contact, irritation, or a suspected reaction is a reason to stop using that product.
Diagnostic table
| What you see | What it suggests | Next check |
|---|---|---|
| Glue squeezes onto skin | Too much or poor placement control | Stop and follow the product cleanup/safety directions. |
| Large dry patch under tip | Too little coverage or fit gap | Check fit, then use the maker’s coverage method. |
| Tip slides while pressing | Layer may be excessive | Use a thinner controlled application next time. |
| Only large nails fail | Amount may not scale with contact area | Follow instructions while accounting for the larger surface. |
| Air pocket stays in one place | Likely profile/placement issue | Do not solve a structural gap with a larger blob. |
| Glue amount varies by formula and tip | No universal drop count fits every product | Use label directions and even contact; do not fill a rocking gap |
A controlled test plan
- 1
Read the glue label before application; products differ in viscosity and instructions.
- 2
Dry-fit the tip so you know the contact area is realistic.
- 3
Apply the recommended thin, even coverage rather than counting universal drops.
- 4
Seat the press-on at the product-recommended angle and pressure.
- 5
After removal, inspect where adhesive actually contacted to refine the next application.
What not to do
- Using a fixed drop count copied from another glue.
- Applying so much glue that it floods the sidewalls.
- Treating excess squeeze-out as proof of a strong bond.
- Using glue to fill a cavity created by a badly mismatched curve.
Worked troubleshooting example
Example: glue squeezes onto the skin around both sides of your pinky while the larger nails apply cleanly. You had been using roughly the same drop size on every finger, so the smallest nail receives proportionally much more adhesive.
On the retry you keep the same tip and prep, but apply the product-directed coverage more carefully for the smaller surface and seat the nail without sliding. Overflow disappears while the underside still shows broad contact, suggesting the original problem was excess volume rather than weak adhesive.
If reducing the amount had created dry patches or the tip still sat on skin, you would return to fit and the manufacturer’s coverage method rather than continuing to shrink the amount. The goal is controlled coverage, not the smallest possible quantity.
Field notes
The useful target is complete, controlled contact—not a particular number of drops. Thumbs and pinkies have very different surface areas, and brush-on glues behave differently from squeeze tubes.
If you consistently need a thick mound to make one nail touch, pause and revisit the tip. A better-fitting press-on usually gives the adhesive a thinner, more predictable job.
If liquid cyanoacrylate-type nail glue reaches skin, follow the product label rather than pulling bonded skin apart or improvising with fabric. Poison Control notes that cyanoacrylate can bond skin and that cotton or wool can react with liquid cyanoacrylate and release heat.
Frequently asked questions
Is more nail glue better for press-ons?
No. The goal is controlled, complete coverage. Too much can flood skin and make placement harder.
Should I use the same amount of glue on every nail?
Not necessarily. Larger nails have more contact area, and the product instructions may call for adjustments.
Why are there air pockets even with lots of glue?
The press-on may have a curve mismatch or the application angle may be trapping air.
Sources checked
Sources below are page-specific. We prioritize manufacturer directions for product-specific steps and use medical or dermatology guidance when a safety question requires it. Always follow the instructions for the exact adhesive or set you own.