How to File Press-On Nails to Fit Without Losing Sidewall Coverage
Customize a slightly large press-on by filing the artificial sidewalls and cuticle edge gradually while preserving full natural-nail coverage.
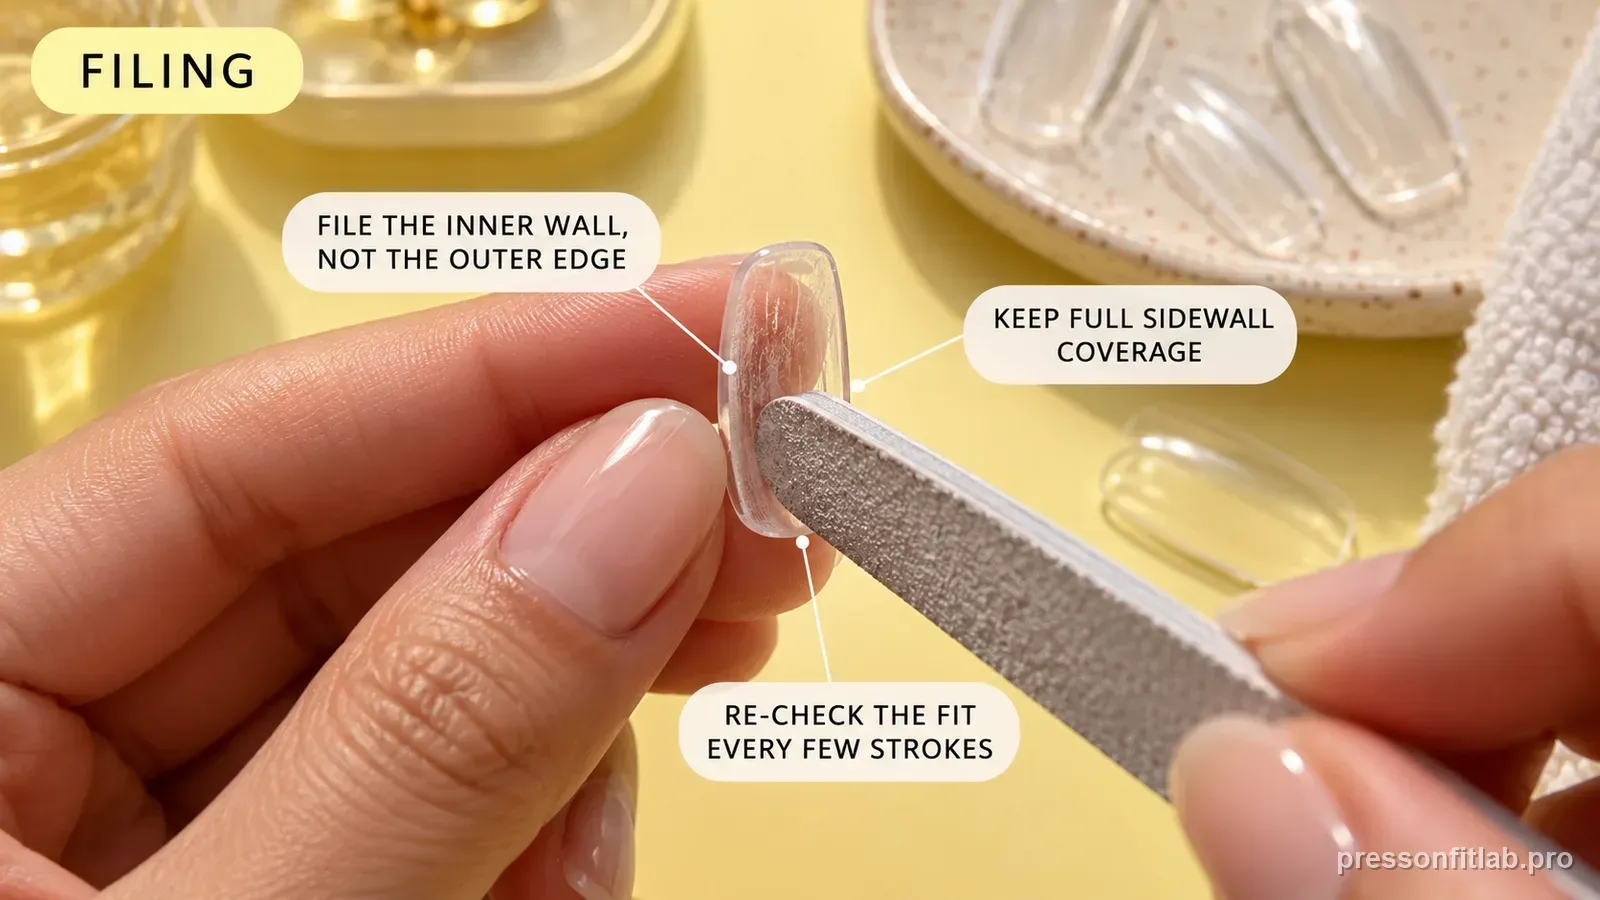
Only file a press-on when its material or manufacturer directions allow it. Start with an unglued tip that fully covers the natural nail and is only slightly large, remove tiny amounts from the artificial edge, and dry-fit repeatedly. Stop as soon as the tip follows the natural nail boundary without touching skin.
Check these first
- ✓ Tip starts slightly larger, not smaller.
- ✓ File only the artificial nail before application.
- ✓ Alternate sides to keep the tip centered.
- ✓ Stop before natural nail becomes exposed.
Choose the right starting tip
Filing is useful only when the press-on material is designed to tolerate it and the physically wider neighboring candidate covers the nail plate with modest artificial-edge excess. It is not a way to rescue a dramatically oversized, badly curved, cracked, or fragile tip. If the physically narrower candidate leaves natural nail exposed, the wider compatible candidate may be more workable because material can sometimes be removed, but missing width cannot be added.
Map the excess before you file
Center the unglued press-on and look straight down. Decide whether both sides are equally wide, one side is simply off-center, or only the lower base corners need refinement.
Marking the extra area mentally or with a removable pencil mark reduces the tendency to file the whole tip narrower than necessary.
Use short, symmetrical passes
Take a few strokes on one side, then the other, and dry-fit again. Keep the file moving in a controlled direction so the artificial edge stays smooth.
Do not chase perfect symmetry if your natural sidewalls are not perfectly symmetrical. The goal is to match the nail you actually have.
Shape the cuticle edge only when needed
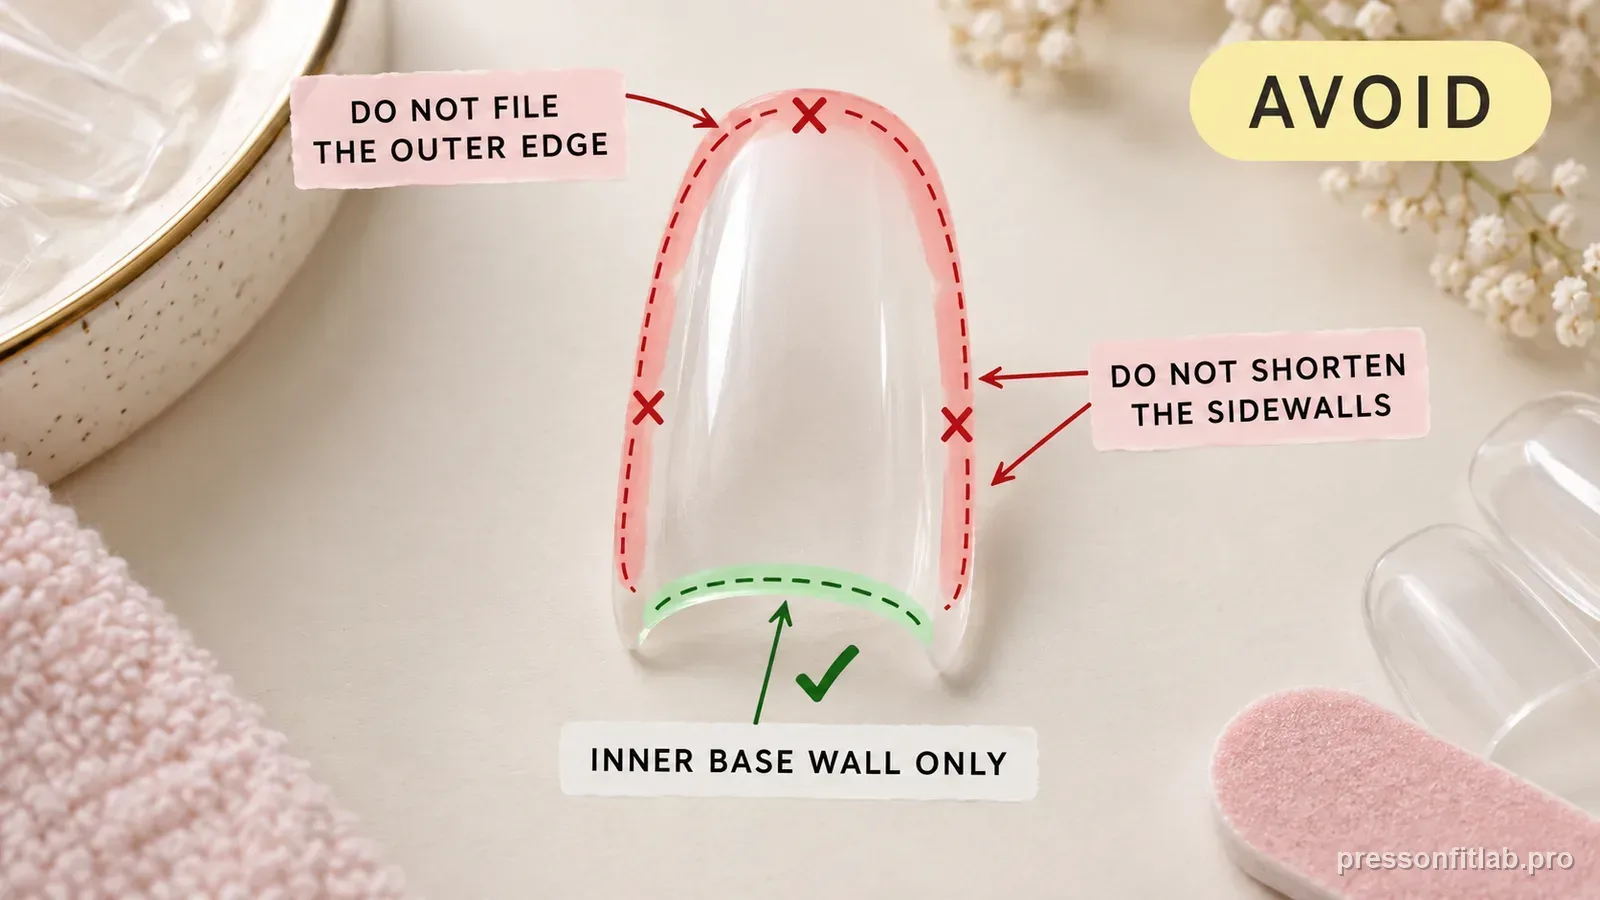
If the width is correct but the base corners sit on skin, refine the artificial cuticle edge rather than narrowing the upper half of the tip. Small changes can make the base look much more integrated.
Keep the press-on entirely on nail plate during the fit test. A perfectly shaped base should not need to be pushed underneath skin.
Recheck curve after resizing
Removing side material can change how the tip settles on the nail. After filing, look again from the free edge for rocking or spring-back.
If the profile is still under tension, stop filing width and compare another tip family. A curve mismatch is not solved by making the nail progressively narrower.
Avoid over-thinning the artificial side edge
Over-filing can make a press-on thin, distorted, or uneven near the side edge. Remove only the artificial material that prevents a compatible tip from sitting on the nail plate. If a large amount would need to come off both sides, compare a neighboring physical-width candidate or another mold instead of heavily rebuilding the piece. A close starting width is easier to keep stable and symmetrical.
Use witness marks so each dry fit teaches you something
Before filing, mark the artificial edge where skin overlap begins. After a few strokes, dry-fit again and see whether the mark has moved onto nail plate. This creates a visible stop point and reduces the temptation to file continuously without checking.
For an off-center tip, mark the nail-plate centerline first and re-center before deciding which side needs material removed. A one-sided witness mark can disappear simply through better placement, saving unnecessary filing.
Save the customized result as a finger template
For reusable sets, label the successfully filed piece by finger and hand. If the product is not reusable, photograph the finished dry fit from above and note the starting size. That gives you a visual reference for the next set and reduces the chance of repeating the same filing from memory.
A saved template is especially helpful for asymmetrical hands. The right index may need two strokes on one side while the left index uses the neighboring size untouched; both can be correct outcomes.
File before adhesive and finish the edge completely
Do all width and base refinement before adhesive is opened. Filing a bonded press-on can transmit force to the natural nail, make dust control harder, and hide whether the fit itself was correct before application. Finish the artificial edge, remove dust using the preparation method appropriate for the product, and only then begin the bond stage.
This order also makes the result reproducible. You can save the final artificial shape as the fitted template instead of mixing shaping and adhesion into one step.
Measure the result after a successful customization
If you use a caliper or ruler, record the final artificial width at the widest fitted point after filing. That number is not a universal press-on size, but it is useful within the same mold family. Paired with a photo and finger label, it helps you recognize whether the next piece starts much wider than the customized fit that already worked.
Diagnostic table
| What you see | What it suggests | Next check |
|---|---|---|
| Extra width on both sides | Symmetric oversize | Alternate filing on both sidewalls. |
| Extra width on one side only | Possible off-center fit | Re-center before filing. |
| Only base corners overlap | Cuticle arc mismatch | Refine the base, not whole tip. |
| Natural nail appears after filing | Over-filed | Use a fresh physically wider candidate. |
A controlled test plan
- 1
Center the unglued tip.
- 2
Mark only the excess.
- 3
File a few strokes.
- 4
Dry-fit again.
- 5
Smooth edges and recheck curve.
What not to do
- Long aggressive filing passes.
- Filing a too-small tip.
- Doing major reshaping after glue application.
Worked troubleshooting example
Example: a tip is slightly too wide on both sides but otherwise matches the curve and cuticle arc. You mark the natural sidewall limits with the tip dry-fitted, remove it, and file three or four strokes from each artificial side rather than taking a large amount from one side at once.
After every few strokes you re-center the tip and check that natural nail is still fully covered. Once the artificial sidewalls sit just inside the skin boundary, you stop; continuing to chase a narrower silhouette would risk exposing the nail plate or weakening the edge.
On another finger where only one side overlaps, you first correct the placement before filing. Symmetric filing is useful for true oversize, while one-sided excess can be a centering problem rather than a size problem.
Field notes
The best filing candidate is slightly too large, not dramatically oversized. Small adjustments preserve the original structure of the press-on.
Frequent dry fitting matters more than speed. The moment the natural nail becomes exposed, you have crossed from customization into undersizing.
Frequently asked questions
Can I file press-on nails smaller?
Often, yes—if the tip material or manufacturer directions allow filing and the press-on is only slightly too large. Work on the artificial edge before application and recheck the dry fit often.
Should I file both sides?
Usually yes when the tip is symmetrically oversized, but match your actual nail shape rather than removing equal material blindly.
Can I file a press-on after it is glued on?
Major fit shaping is safer and easier before application. Follow the product directions for any finishing after application.
Sources checked
Sources below are page-specific. We prioritize manufacturer directions for product-specific steps and use medical or dermatology guidance when a safety question requires it. Always follow the instructions for the exact adhesive or set you own.