How to Measure Press-On Nails in Millimeters
A practical press-on nail sizing method using millimeters, with tips for curved nails, in-between sizes, and recording all ten measurements.
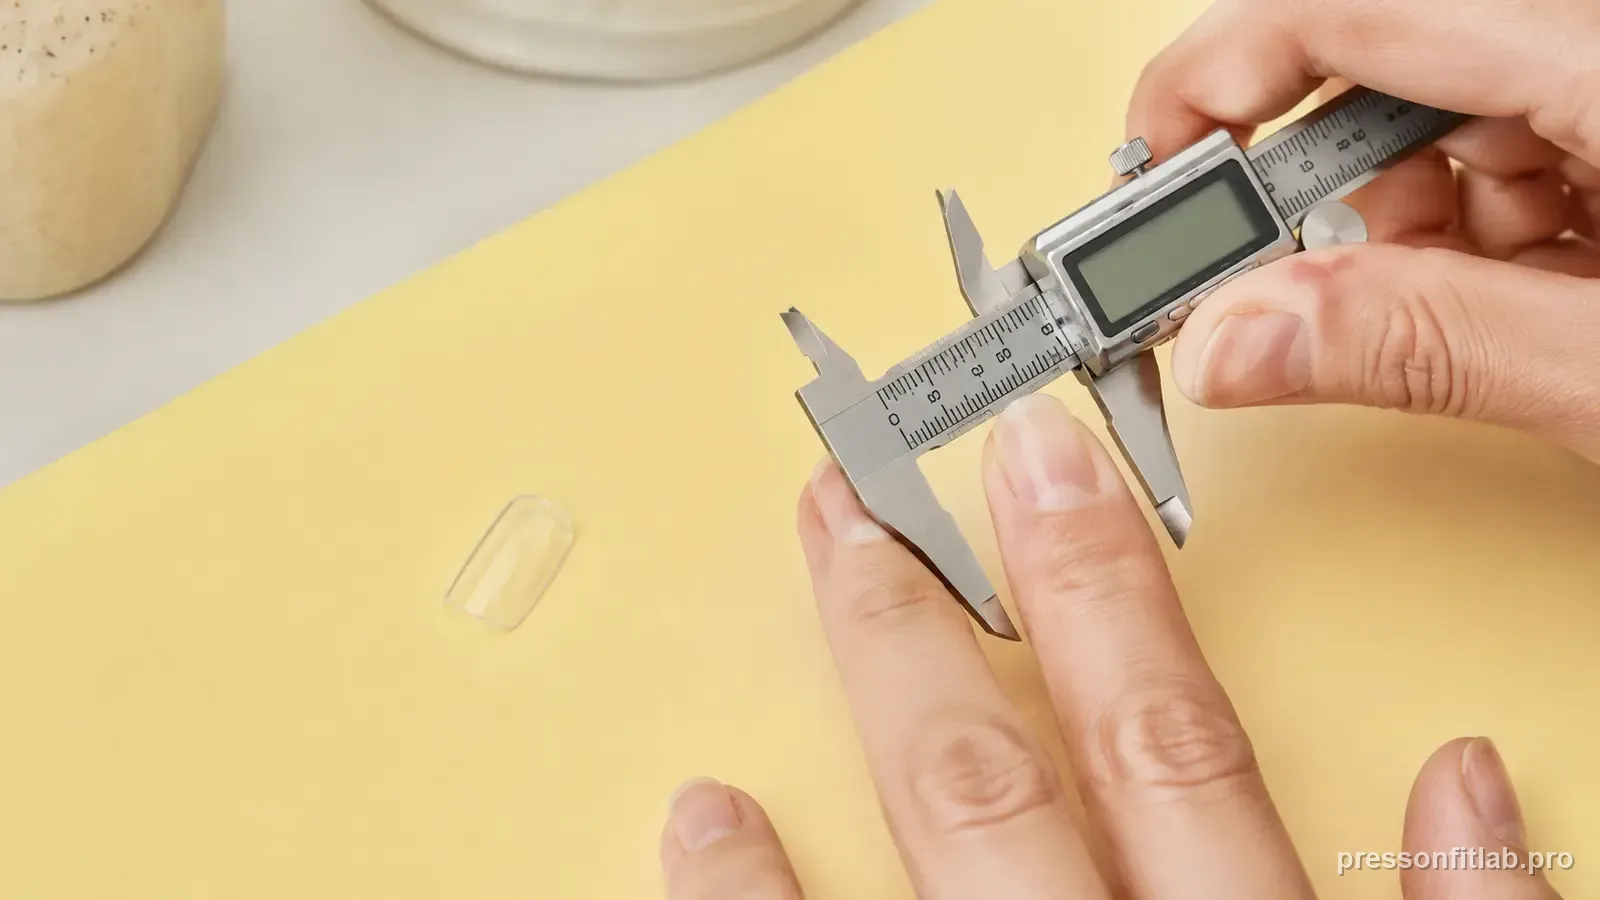
Measure the widest part of each natural nail from sidewall to sidewall in millimeters. Record all ten fingers rather than assuming both hands match. If your measuring method follows the nail curve, use the brand chart that expects a curved measurement; if it measures a straight horizontal width, use a chart built for that method.
Check these first
- ✓ Measure the widest visible nail-plate width.
- ✓ Record left and right hands separately.
- ✓ Do not mix straight-width and curved-width charts.
- ✓ When between sizes, compare the actual tip fit before filing.
Why millimeters matter
Press-on size numbers are not universal. A size 2 from one brand may not equal a size 2 from another, and handmade sellers can use their own charts. Millimeters give you a portable measurement that can be compared with any chart that clearly explains its method.
The goal is not to find a universal number for every brand. The goal is to know your natural-nail width accurately enough to choose the closest compatible tip.
Method 1: transparent tape or flexible strip
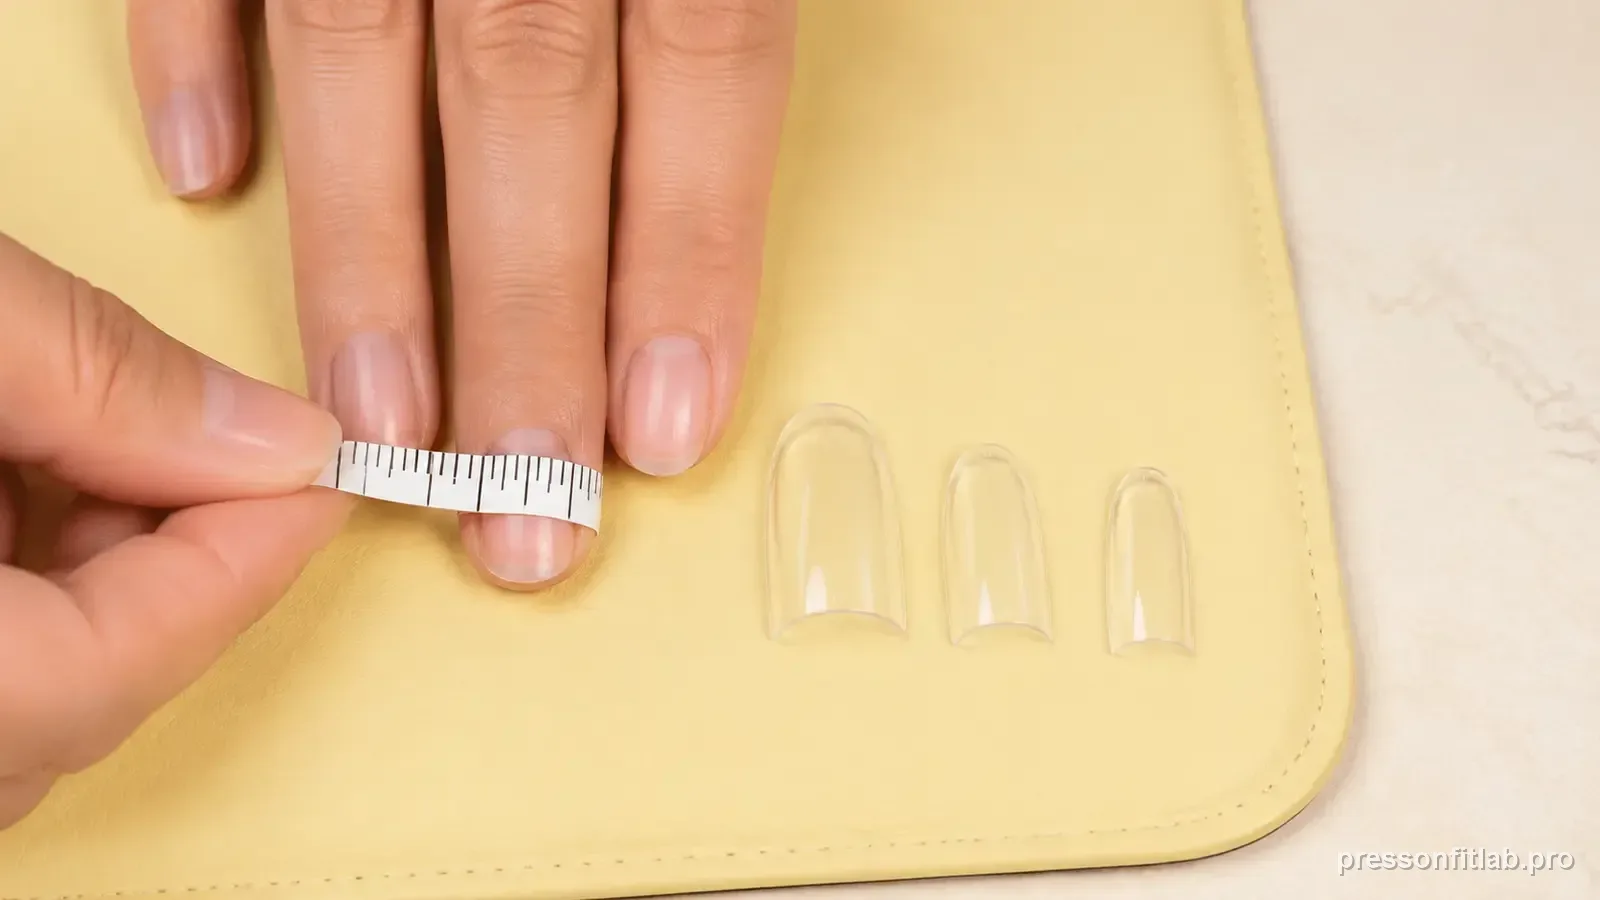
Place a narrow strip of transparent tape across the widest part of the nail. Mark the left and right sidewalls with a fine pen, remove the tape, lay it flat, and measure between the marks with a millimeter ruler.
This method is useful when the nail is curved because the tape follows the surface. But remember that the resulting measurement travels over the curve; do not compare it with a chart that expects only a straight horizontal width unless the brand says to.
Method 2: straight-width check
A small caliper is the clearest way to capture straight horizontal width without wrapping around the curve. Close it gently across the widest visible part of the nail plate without squeezing skin.
For a ruler, hold it above the nail and read edge to edge as accurately as possible. This is less precise on very curved nails, so repeat the measurement.
Measure all ten nails
Do not assume your right and left hands match exactly. Small asymmetries are normal and can be enough to affect a press-on fit. Record the values in thumb-to-pinky order for each hand.
A useful notation is L: 16, 12, 13, 12, 9 / R: 16, 12, 13, 11, 9. Those numbers are only an example; your measurements should come from your own nails.
What to do between sizes
When your measurement falls between two candidates, check the current brand or product instruction and dry-fit both sizes before deciding. Some manufacturers currently direct users to size up, while others direct them to size down. A tip that leaves visible natural nail cannot be made wider; a slightly wide tip may be refinable only when its curve is comfortable and its material and manufacturer directions allow that adjustment.
Curve still matters. A wider tip with a very strong curve may pinch even after side refinement. Width and underside shape should be checked together.
Control measurement error before trusting the number
Repeat each uncertain measurement at least twice and keep the strip or caliper at the same widest point. A one-millimeter difference can move you between adjacent tips in some sets, so an angled tape strip or squeezed sidewall can create a false decision. Measure the nail plate, not surrounding skin, and avoid pressing flexible tape so tightly that it deforms the finger.
If two readings disagree, do not average them automatically. Re-check the physical landmarks, then compare the closest real tips. The final dry fit can reveal which number better represents the usable nail-plate width for that mold.
Turn the numbers into a reusable fit record
Store ten millimeter widths in left-thumb-to-pinky and right-thumb-to-pinky order, then add notes for curve, cuticle shape, and any finger that repeatedly uses an alternate tip. The width values are the portable layer; printed size labels belong beside the specific brand and shape that produced them.
This separation prevents a common mistake: assuming a size 3 in one set must equal size 3 in another. Start new brands from your raw widths, check the seller’s stated measurement method, and finish with a real dry fit before adhesive.
Diagnostic table
| What you see | What it suggests | Next check |
|---|---|---|
| Tape pulled tightly | Reading comes out too small | Lay tape gently over the nail curve without stretching it. |
| Measured only one hand | Matching finger on the other hand may differ | Record all ten nails separately. |
| Measured near the cuticle only | Misses the widest point | Measure at the widest sidewall-to-sidewall span. |
| Used S/M/L labels from another brand | Brand systems are not standardized | Keep your millimeter profile and compare it with each brand chart. |
| Between two tip widths | Either visible gap or skin overlap | Dry-fit both. Refine a slightly larger artificial tip only when its material and manufacturer directions allow filing. |
A controlled test plan
- 1
Remove polish or anything that hides the natural sidewall boundary.
- 2
Measure each nail at its widest point using the same method the seller chart expects—either a flexible over-curve method or a straight-width method. Do not mix the two.
- 3
Write the result in millimeters for left thumb through left pinky, then repeat on the right hand.
- 4
Measure a second time if a value looks unusual; a 1 mm error can change the chosen tip in some systems.
- 5
Use the numbers as a starting filter, then dry-fit the actual press-on because curvature can make a width match behave differently.
What not to do
- Assuming both thumbs are identical.
- Converting a brand size number into a universal millimeter size.
- Measuring the skin around the nail instead of the nail plate boundary.
- Treating millimeters as a substitute for a curve check.
Worked troubleshooting example
Example: your first tape measurement says the left index is 12 mm, but a second attempt gives 13 mm. Before choosing a preset size, you repeat the measurement at the widest part and realize the first tape strip was angled slightly toward the cuticle instead of crossing the true widest point.
You record 13 mm and then dry-fit the two closest tips from the set. The physically narrower candidate leaves a narrow strip of natural nail visible at one side; the neighboring physically wider candidate covers the plate. If that exact product permits light filing, you can test a small artificial-sidewall refinement rather than treating filing as a universal step. That real-tip check confirms which measurement is more useful for this mold.
You save both left and right hand widths in millimeters and note the brand/shape beside them. The next time you buy a different set, you start from the measurements but still verify the actual tip because printed size numbers and mold profiles are not portable across brands.
Field notes
Your measurement profile is more portable than any preset size such as XS, S, M, or L. Preset bundles are convenient, but their meaning changes by brand and mold family. Saving ten millimeter values lets you compare new size charts without starting over every time.
For curved nails, a flexible strip can be easier when the seller expects an over-curve measurement, while a caliper or other straight-width method belongs with charts built for straight width. Do not switch methods mid-comparison. The final fit check still happens with the real tip: it should cover the nail plate sidewall to sidewall without sitting on skin.
Frequently asked questions
Are press-on nail size numbers universal?
No. Size numbers vary by brand, so millimeter measurements are more useful when switching between systems.
Should I measure both hands?
Yes. Corresponding fingers can differ slightly, and that difference can affect fit.
What if I am between press-on sizes?
Check the current brand or product instruction, then dry-fit both neighboring candidates. Reject a tip that leaves visible natural nail, overlaps skin heavily, pinches, or rocks; only refine an artificial edge when the material and manufacturer directions allow it.
Sources checked
Sources below are page-specific. We prioritize manufacturer directions for product-specific steps and use medical or dermatology guidance when a safety question requires it. Always follow the instructions for the exact adhesive or set you own.