How to Label Reusable Press-On Nail Sizes So the Next Set Fits Faster
Organize reusable press-ons by finger, hand, width, and alternate size so you can reapply a set without guessing which similar-looking nail belongs where.
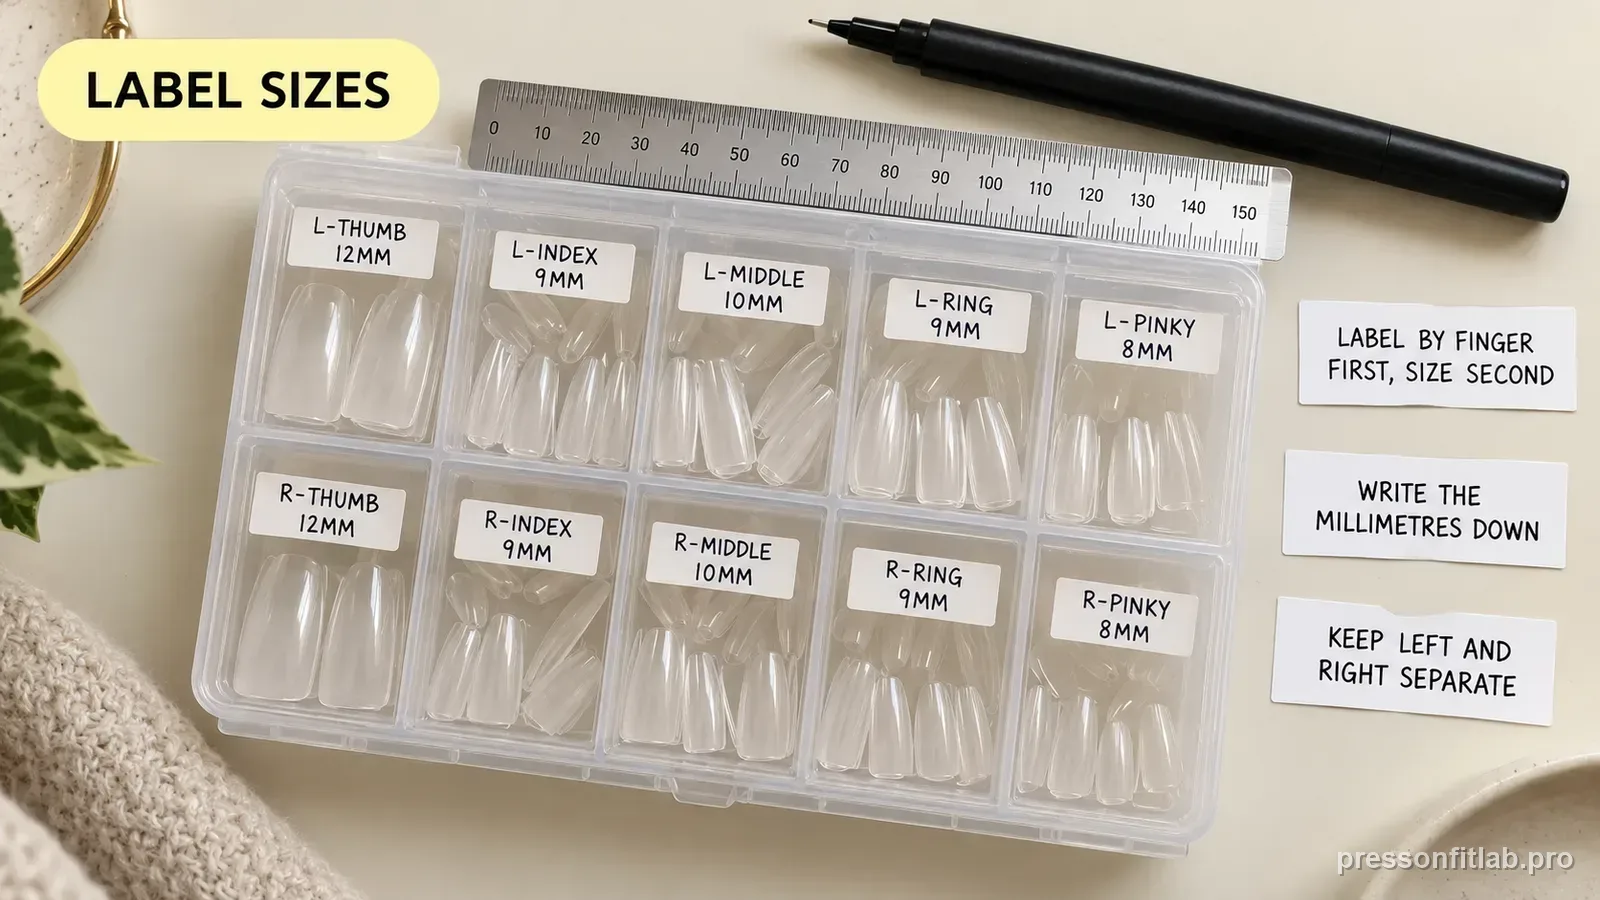
Label reusable press-ons by the finger they actually fit, not only by the tiny printed size number. Store left and right hands separately, keep any alternate thumb/index pieces with the set, and record millimeter widths in a reusable fit profile. This prevents mix-ups after removal and makes it easier to spot when a cleaned nail truly fits differently rather than simply being on the wrong finger.
Check these first
- ✓ Do the left and right hands use exactly the same sizes? Do not assume they do.
- ✓ Are factory size numbers visible after several wears?
- ✓ Do you have alternate pieces for typing, gym, or a finger that changes length?
- ✓ Can each stored nail be returned to the same finger without remeasuring?
Label by finger first, size number second
Factory numbers can help within one set, but they are not universal across brands and may be hard to read after adhesive residue or multiple wears. Your most useful label is functional: L thumb, L index, L middle, L ring, L pinky, then the five positions for the right hand.
If the original tray already keeps nails in order, preserve that order. If not, use a small reusable card or compartment map rather than writing aggressively on a finished nail surface.
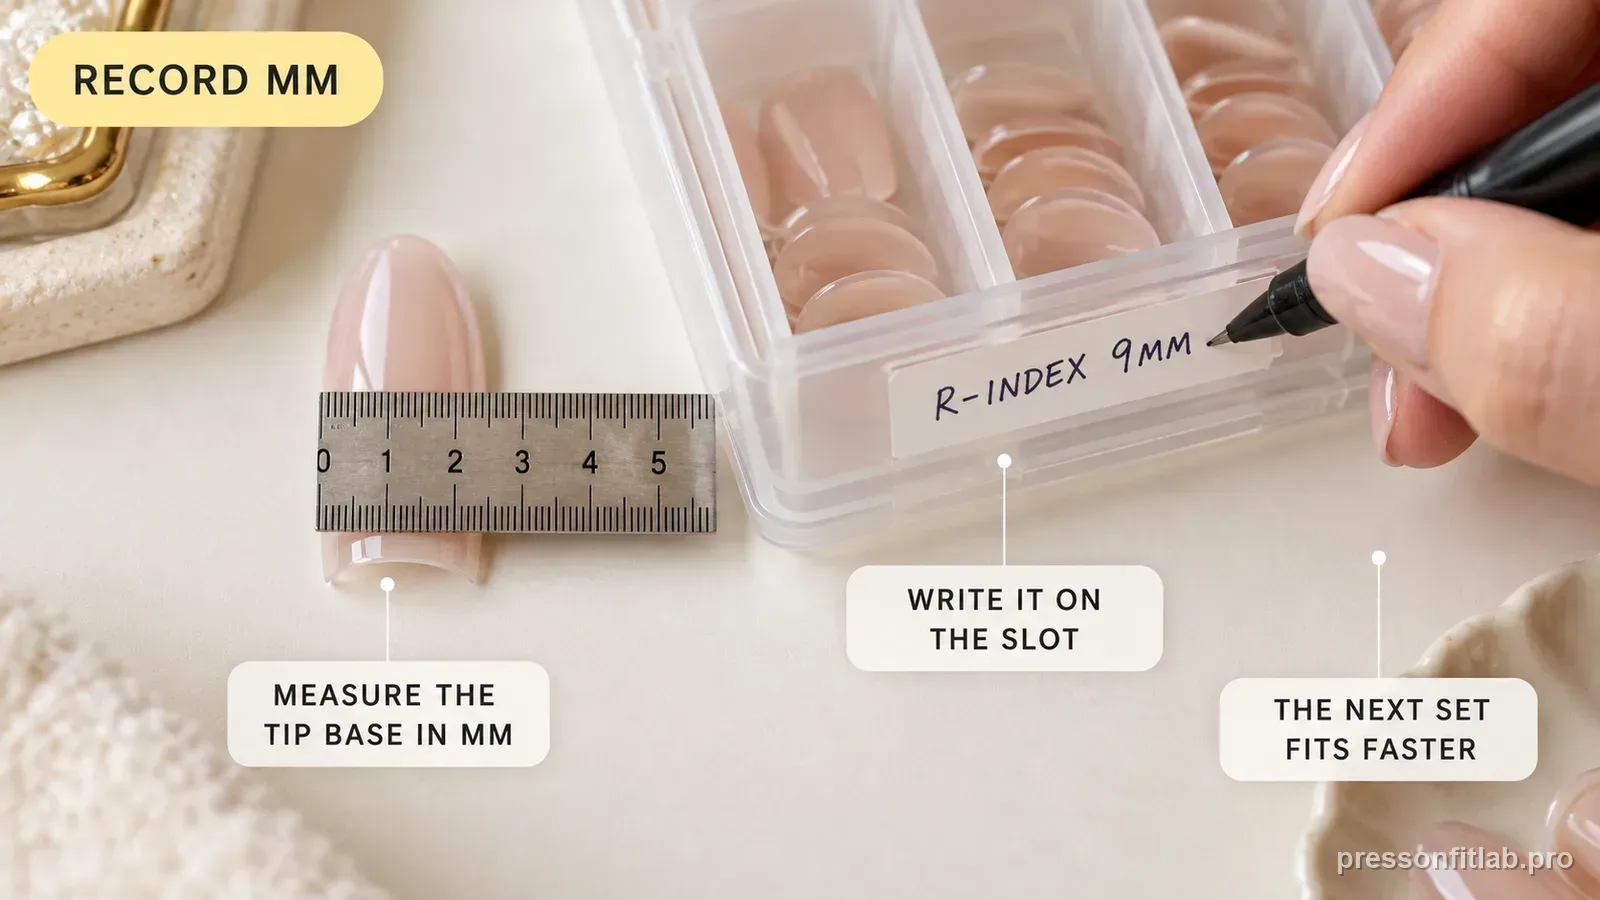
Record millimeters beside the stored set
A millimeter width profile survives when you switch brands. Record the measurement method as well—straight width versus a curved tape method—so future comparisons use compatible charts. Do not translate the profile into a universal 0–9 size because different brands can assign those numbers differently.
Add notes only where they change a decision, such as “R thumb: between two sizes; wider candidate needs a tiny side adjustment if this product permits filing” or “L index: short version for laptop.” This turns the storage case into a reusable setup rather than a pile of pretty pieces.
Keep left and right hands separate
Natural nails are often close to symmetrical without being identical. Mixing the two hands can create a press-on that looks almost right but leaves a subtle side gap or cuticle mismatch. Separate hand compartments remove that source of error before you troubleshoot glue.
This matters most when several nails are only one millimeter apart. Visual sorting after removal is surprisingly unreliable when the designs are identical.
Label alternates for different routines
If you use a shorter index for typing or a lower-projection thumb for the gym, keep that alternate with the main set and note the use case. You are building a configuration, not just identifying a size.
A simple notation such as “R index—daily medium / laptop short” is enough. When you switch back to an event set, you can restore the longer piece without redoing all ten measurements.
Update the profile only after a clean dry fit
If a reused nail suddenly seems too tight or starts rocking, do not immediately rewrite the stored size. First remove residue, let the piece dry, and confirm it has not warped. A dirty or distorted underside can imitate a sizing change.
Only change the profile when a clean, structurally sound tip consistently fits differently or when you intentionally switch brands and compare against that brand’s chart.
Diagnostic table
| What you see | What it suggests | Next check |
|---|---|---|
| Two similar nails get mixed up | Finger mapping is incomplete | Store left/right positions separately |
| Factory number is unreadable | Number-only system is fragile | Use finger + millimeter record |
| Laptop week needs shorter index | Alternate configuration | Label and store short index with main set |
| Reused nail suddenly feels wrong | Residue/warp may mimic size change | Clean and dry-fit before editing profile |
| New brand uses different size numbers | Cross-brand number mismatch | Return to millimeter measurements |
A controlled test plan
- 1
Measure and record all ten nails in left/right thumb-to-pinky order.
- 2
During first dry fit, assign each reusable piece to a finger before adhesive is opened.
- 3
Store the pieces in the same order after removal and cleanup.
- 4
Add only meaningful alternate notes such as a short work index or a larger thumb that received a permitted minor filing adjustment.
- 5
Before each rewear, compare the stored label with a clean dry fit and update only if the fit truly changed.
What not to do
- Writing directly on decorative surfaces with permanent marker.
- Assuming a printed size 3 means the same width in every brand.
- Dumping all ten identical designs into one bag and sorting by eye later.
- Changing the saved size because old glue made one reused nail sit high.
Worked troubleshooting example
Example: after removing a French set, you place all ten nails loose in a tray. On the next wear, two nearly identical middle/ring pieces are swapped, and one side lifts even though both seem close in width.
You rebuild the system: L1–L5 and R1–R5 positions in the case, plus the millimeter profile. The correctly mapped nails sit flush again. You also label a shorter R index as “laptop.”
The next reapplication takes minutes because you no longer remeasure or guess. When a nail really does fit differently, you know the mapping itself is not the cause.
Field notes
A labeled reuse system has practical value because it eliminates false troubleshooting. Many “this set fits differently now” problems start with mixed-up fingers or residue, not with the hand changing size.
Keep the profile simple enough that you will actually use it. Ten finger positions, millimeter widths, brand/set name, and a few alternate notes are usually more useful than a complicated spreadsheet.
Frequently asked questions
Should I label press-ons by the brand size number?
You can record it, but also label by finger and keep millimeter widths. Brand size numbers are not universal.
Do my left and right hands need separate press-on sizes?
They can. Small asymmetries are normal, so storing the hands separately prevents near-match mix-ups.
What should I write in a reusable nail profile?
Record left/right finger position, width in millimeters, brand/set, and only the alternate fit or length notes that affect application.
Sources checked
Sources below are page-specific. We prioritize manufacturer directions for product-specific steps and use medical or dermatology guidance when a safety question requires it. Always follow the instructions for the exact adhesive or set you own.