How to Repair One Press-On Nail That Popped Off
Reapply one popped-off press-on without restarting the whole manicure. Diagnose why that finger failed, clean the old bond, and reset only what changed.
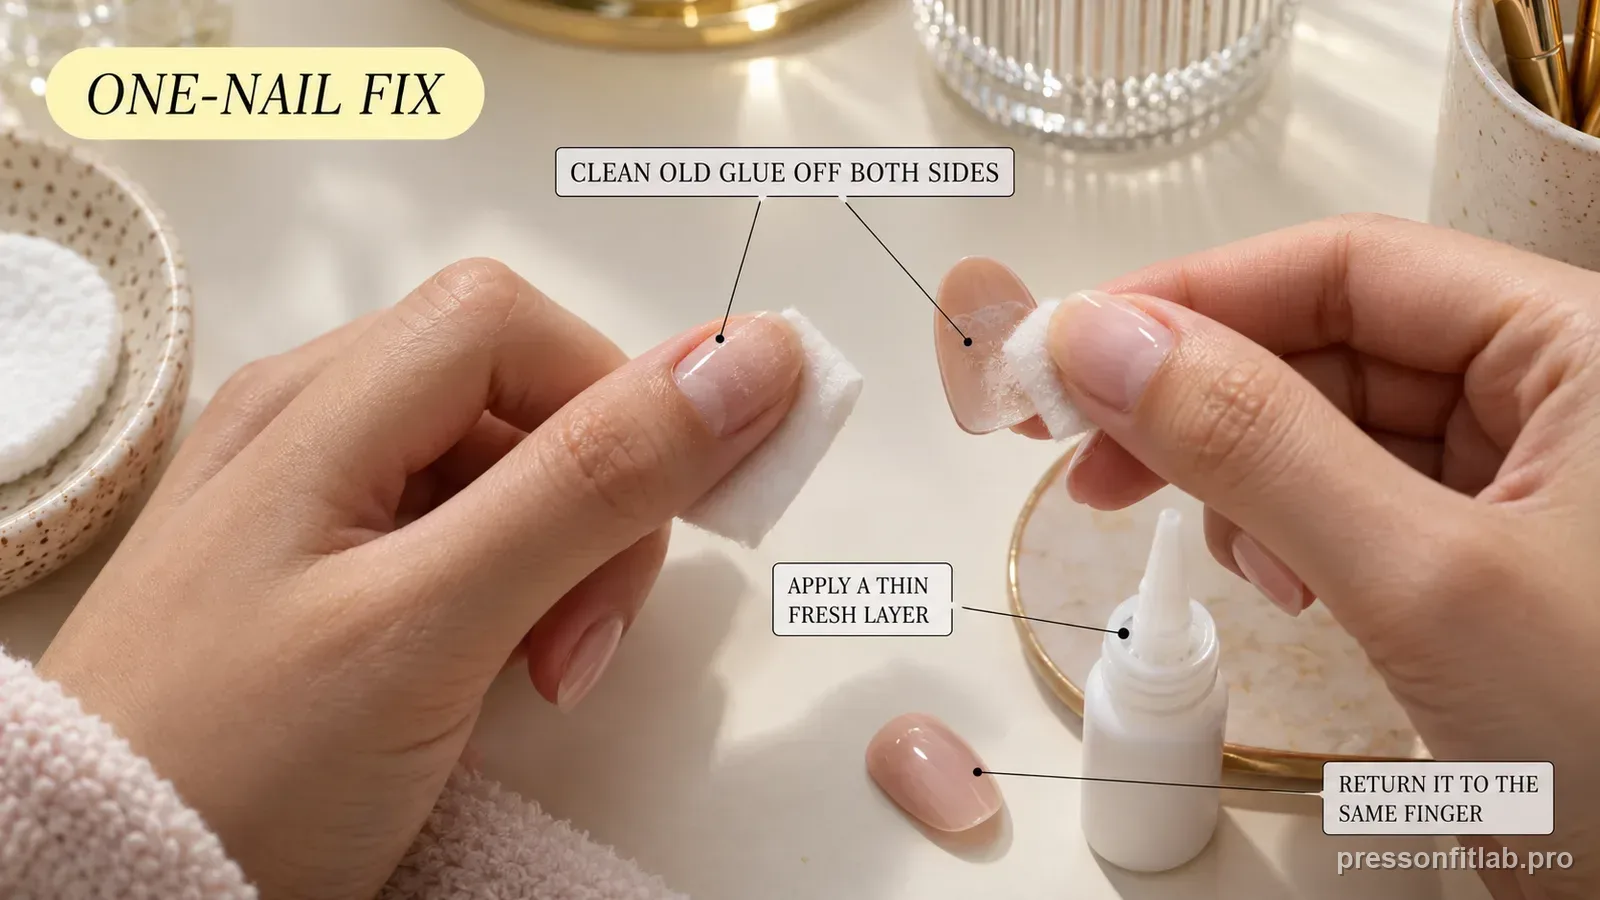
If one press-on pops off and the natural nail is comfortable, treat it as a one-finger repair. Save the artificial nail, remove old adhesive from both surfaces using the product-approved method, let everything become fully clean and dry, then dry-fit the press-on again before using fresh adhesive. If the same finger has popped off before, change its size, curve, length, or placement rather than simply repeating the identical repair.
Check these first
- ✓ Did the press-on pop off intact or crack during the failure?
- ✓ Is old glue or tab residue making the underside uneven?
- ✓ Does the nail still fit flush when placed back without adhesive?
- ✓ Has this exact finger failed before while the rest of the set stayed secure?
Do not turn a one-nail failure into a ten-nail redo
When nine nails remain secure, they are useful controls. Leave them alone and investigate the failed finger. Compare its size, curve, length, and daily use with the corresponding finger on the other hand. A localized failure often contains more information than a full-set failure because most of the original application clearly worked.
Save the popped-off piece for inspection if it is intact, even when the system does not permit reusing it. Its underside can provide clues about where adhesive remained or built up unevenly, but residue alone should not be treated as proof of one failure cause.
Clean off the old bond before adding a new one
Fresh adhesive should contact clean surfaces, not a lumpy stack of old glue or a compressed used tab. Follow the removal and cleanup directions for the exact product. Some reusable systems are designed around replacing tabs; glue-applied sets may require a different cleanup method and may be less reusable depending on the brand.
Avoid aggressive scraping that thins the artificial nail or natural nail. If the residue cannot be removed without damaging the press-on, using a spare tip may be the better repair.
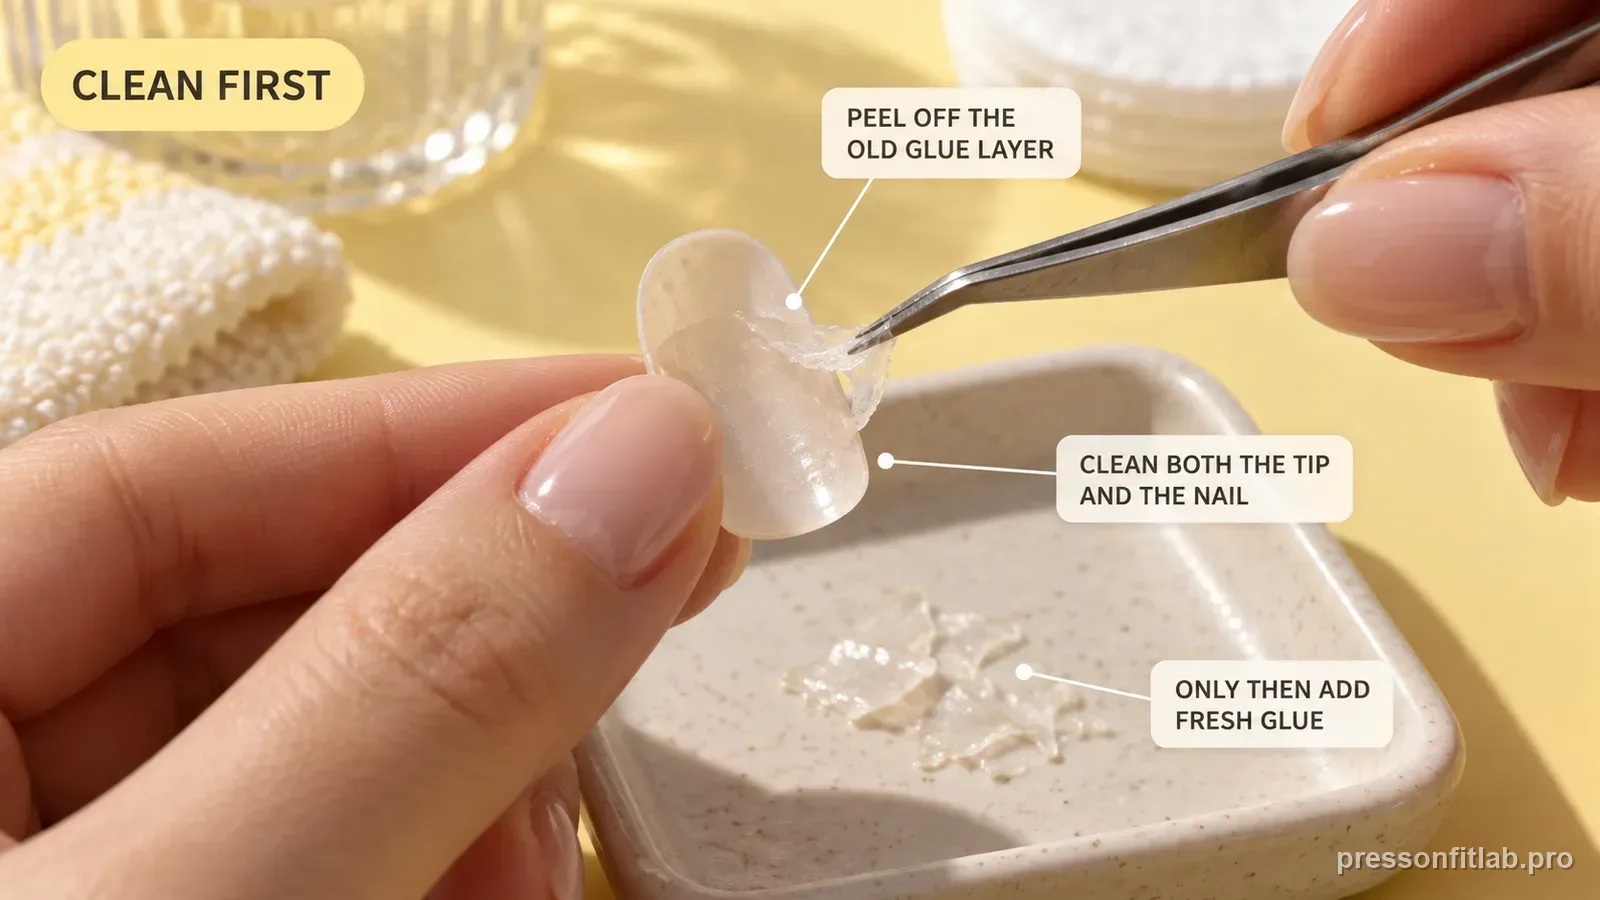
Dry-fit again because the failure may have changed the nail
A popped-off press-on can bend during the event or during retrieval. Place it back on the dry natural nail with no adhesive and look for rocking, side gaps, or a changed cuticle arc. If it no longer sits the way it did before, do not assume glue will force it back into shape.
Also compare the tip with an unused spare from the set. A subtle warp is easier to see side by side than while holding one loose nail in the air.
Change one variable if the finger is a repeat offender
If this is the first failure, a clean one-finger reset may be enough, but reapply the same artificial nail only when the exact system permits reuse/reapplication; otherwise use a fresh compatible spare. If the same finger has popped off twice, use the repair as a controlled test. Compare a neighboring size if the current tip is narrow, try a better-matched curve, test a shorter molded length if leverage is high, or correct placement if the base was partly on skin. Only file or shorten a tip when its material and product directions support that modification.
Do not change size, glue amount, prep, length, and brand all at once. You will not know which change solved the problem.
Reapply only when the natural nail is ready
The natural nail should be clean, dry, and comfortable. If the pop-off tore surface layers, caused pain, or left the surrounding skin irritated, leave that finger bare instead of immediately covering it. Artificial nails can hide changes that deserve observation.
Once conditions are normal, follow the exact adhesive application and water-wait directions. Treat the repaired finger as a new application even though the other nine nails are already several days into wear.
Diagnostic table
| What you see | What it suggests | Next check |
|---|---|---|
| Press-on popped off cleanly | Inspect for fit/failure clues; reuse depends on product | Use the same tip only if the system permits reuse and it still dry-fits; otherwise choose a fresh spare |
| Old adhesive forms a thick ridge | Uneven re-bond surface | Remove residue gently or use a spare |
| Nail now rocks after popping off | Tip may be warped | Replace rather than forcing a distorted tip into place |
| Same finger has failed twice | Fit or leverage issue | Change one finger-specific variable |
| Natural nail is sore or damaged | Not ready for repair | Leave bare and monitor rather than re-cover |
A controlled test plan
- 1
Inspect the popped-off nail and photograph the underside before cleaning if the adhesive pattern is visible.
- 2
Remove old adhesive according to the product directions and let both surfaces dry completely.
- 3
Dry-fit the same tip and one neighboring size or spare for comparison.
- 4
Reapply only the failed finger, changing one suspected variable if it is a repeat failure.
- 5
Track whether the next failure point moves; a changed pattern can confirm that your test mattered.
What not to do
- Putting fresh glue directly on top of old uneven glue.
- Reusing a nail that cracked or warped during the pop-off.
- Prying at the natural nail to speed cleanup.
- Rebuilding the entire manicure when only one finger needs diagnosis.
Worked troubleshooting example
Example: your right thumb pops off while opening a food container, but the other nine nails are secure on day five. The press-on is intact and the underside shows adhesive contact except near one sidewall.
Clean the piece, dry-fit it, and notice that it is slightly narrow on that thumb. Compare the next wider tip; if its curve is comfortable and that product permits filing, refine only the small artificial sidewall excess. Keep the same prep and adhesive so the fit change is the variable you are testing.
If the replacement now stays on through the same routine, the repair solved a thumb fit issue rather than proving that the original glue was too weak.
Field notes
Single-nail repair is one of the best troubleshooting opportunities because the other nine nails tell you what did not need changing. Use that control instead of restarting from zero.
If a press-on disappears after popping off, use a spare that matches actual millimeter width and curve rather than relying only on the printed size number.
Frequently asked questions
Can I glue back on one press-on nail?
Only when the exact press-on system permits reusing or reapplying that tip, the natural nail is comfortable, and the piece remains intact and clean. If the system does not support reuse, use a fresh compatible spare instead.
Do I have to remove the other nine nails?
No. If they are secure and comfortable, they can remain in place while you repair the single failed finger.
Why does the same press-on keep popping off?
When the same finger fails repeatedly, recheck that finger’s fit, curve, placement, length, and daily leverage before assuming the whole adhesive system is at fault.
Sources checked
Sources below are page-specific. We prioritize manufacturer directions for product-specific steps and use medical or dermatology guidance when a safety question requires it. Always follow the instructions for the exact adhesive or set you own.