Why Do My Press-On Nails Keep Bending?
Diagnose flexible press-ons that bend during wear by separating normal material flex from excessive length, poor support, heat damage, warping, and a bad fit.
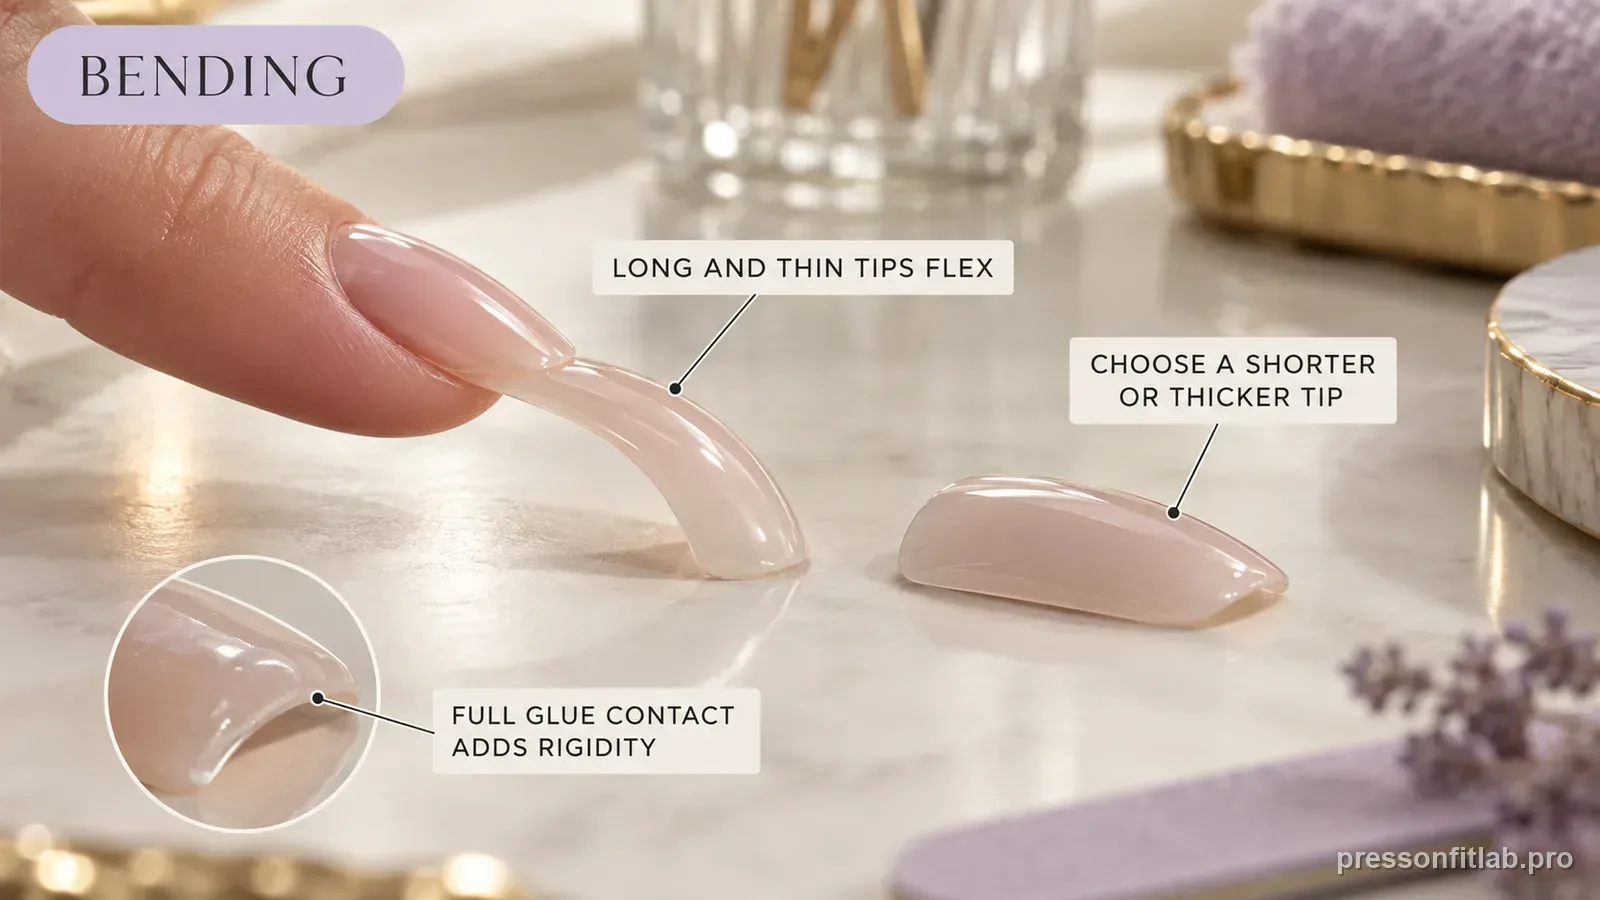
Some press-ons are intentionally flexible, so bending is not automatically a defect. The problem is repeated flex that feels unstable, changes the shape, lifts the bond, or leaves a crease. Check where the nail bends, how long the extension is, whether the tip was already warped, and whether the base is fully supported by the natural nail. If bending starts beyond the natural free edge, testing a shorter design—or shortening the tip only when that product is designed for it—is a clean way to check leverage.
Check these first
- ✓ Does the bend occur over the natural nail or only in the free edge?
- ✓ Was the press-on already warped before application?
- ✓ Does the same finger bend repeatedly because of daily tasks?
- ✓ Is a thin/flexible tip being used at a length that creates high leverage?
First decide whether the flexibility is normal
Thin or soft press-ons may flex slightly when handled, especially before application. Once bonded to the natural nail, the covered portion should feel supported. A small amount of movement at the free edge can be normal depending on the product.
What deserves troubleshooting is a nail that repeatedly folds, creases, changes shape, or uses that movement to peel the bond upward.
Find the bend line
If the bend occurs beyond your natural free edge, length and material stiffness are the main suspects. If it happens over the nail plate, check whether there is a hollow gap underneath or whether the tip is warped and not fully supported.
A visible center gap can turn the artificial nail into a bridge. Pressure then makes it flex into the unsupported space.
Shorten leverage before changing adhesive
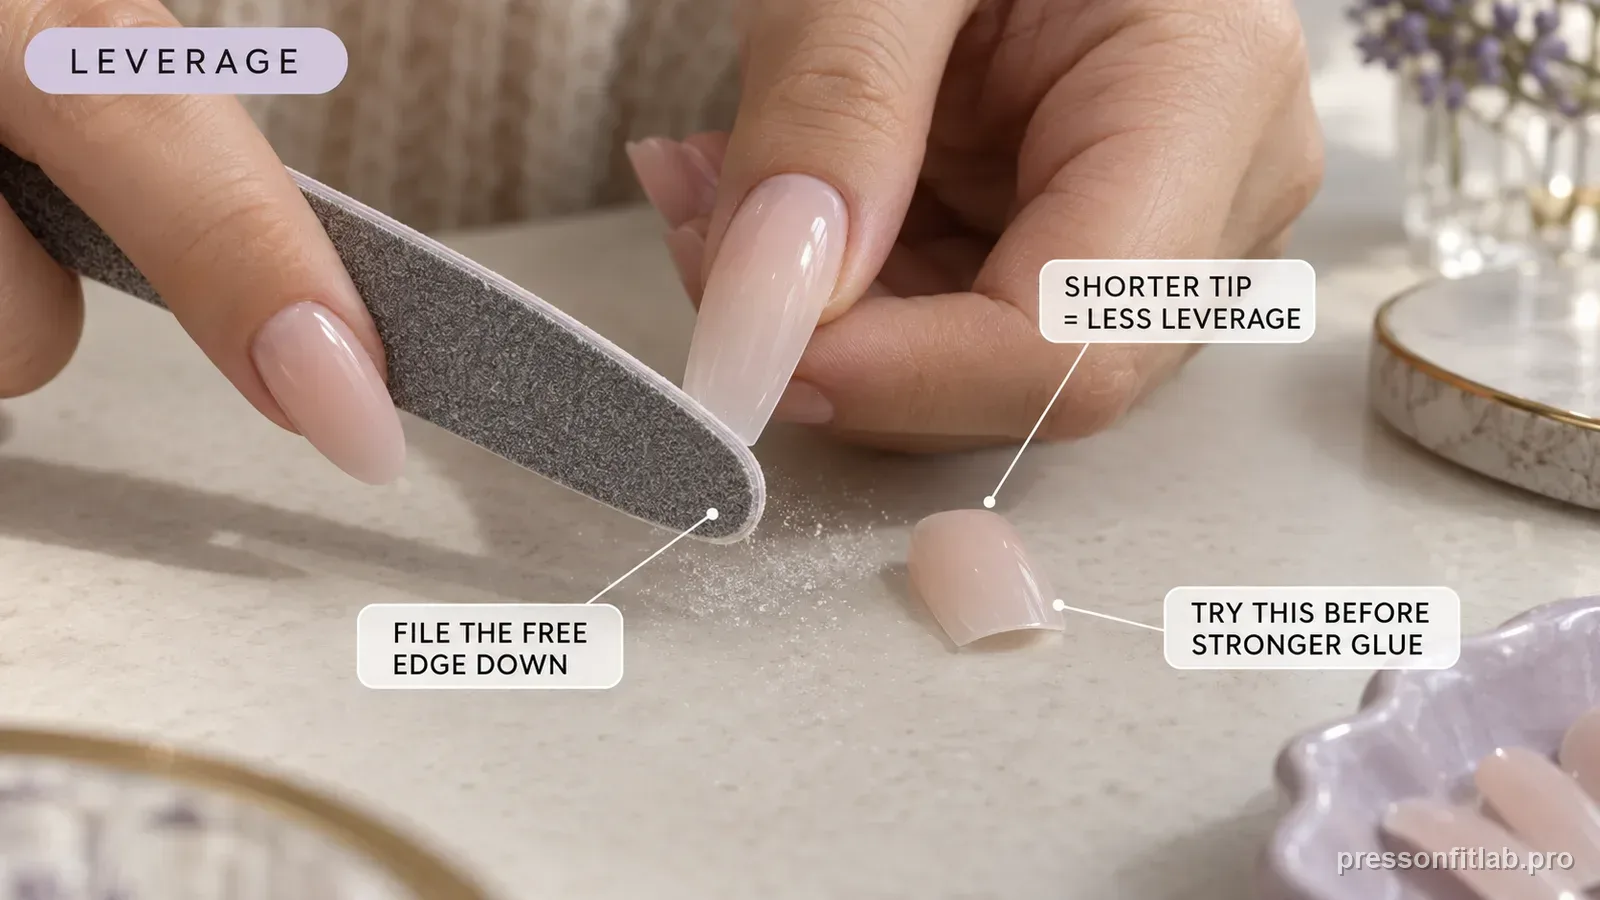
A longer extension creates more leverage when typing, opening containers, or bumping objects. Test a shorter molded length, or shorten the free edge only when the tip material and manufacturer instructions support that modification, while keeping fit and adhesive the same.
If the bending stops at shorter length, you learned that mechanical leverage mattered more than bond strength.
Inspect reused nails for warping
A press-on can change shape during removal, storage, or exposure to conditions the product was not designed for. Before reusing it, compare it with an unused spare or its matching counterpart from the same set, then dry-fit it on the intended natural nail. A twisted or permanently bent tip may no longer sit as intended; a flat tabletop is not a valid shape standard for a naturally curved press-on.
Follow manufacturer reuse and removal directions rather than heating or aggressively reshaping finished nails unless the product specifically allows it.
Match material and length to your routine
A very flexible long nail may be comfortable for one person and annoying for someone who types all day. This is a use-case decision rather than a universal quality score.
If repeated flex is your main failure pattern, a shorter shape or a more supportive tip can be a better fit for your routine than simply stronger glue.
Separate normal flex from a tip that is losing shape
Some press-on materials flex slightly under load, especially at longer free edges. The useful question is whether the tip returns to its original shape and remains fully seated, or whether it develops a crease, sidewall stress mark, permanent warp, or repeated lifting after each bend. Flex that happens only at the unsupported free edge is different from the entire nail rocking because the base does not match the natural nail.
Inspect the underside and sidewalls after removal if the product is reusable. A tip that has permanently changed curvature may no longer reproduce the first-wear fit even if the printed size is unchanged. That is a reuse-fit issue, not simply an adhesive problem.
Reduce leverage before escalating adhesive strength
Longer nails amplify force at the bonded base when the tip hits a key, drawer, gym handle, or cleaning tool. Before changing to a stronger adhesive, test a shorter molded length on the fingers that bend most often; only file or trim an existing tip when that product is designed for it. Keep width and curve constant so the result tells you whether leverage was the main variable.
If bending continues close to the cuticle or sidewall even at a practical length, compare a different tip construction or shape rather than trying to lock a visibly stressed tip down harder. A stable fit should not depend on the artificial nail repeatedly flexing into the natural nail.
Treat repeated bending as a fit-history signal
Write down which finger bends, where the bend occurs, and what task preceded it. A free-edge flex during occasional contact is different from a repeated crease near the same sidewall. If the same nail bends in the same place across several wears, inspect the tip for a weak spot, over-filing, or a shape that concentrates force there.
For reusable sets, retire a piece that no longer returns to its intended profile. Reusing a permanently distorted tip can turn a wear problem into a fit problem because the underside geometry is no longer the one you originally sized.
Diagnostic table
| What you see | What it suggests | Next check |
|---|---|---|
| Bends only past natural free edge | Length/material leverage | Test a shorter molded length, or shorten only if the product allows it |
| Bends over center of nail plate | Unsupported gap or warped tip | Check center contact and profile |
| Only reused nail bends | Removal/storage distortion | Compare with new tip; retire warped nail |
| Multiple long nails bend during tasks | Routine exceeds current stiffness/length | Choose shorter or more supportive design |
A controlled test plan
- 1
Inspect the unglued tip for existing warping.
- 2
Dry-fit and check for a hollow center or rocking.
- 3
Wear one test nail at a shorter molded length, or shorten the existing tip only if the product permits it, with the same adhesive.
- 4
Track whether bending occurs during a specific task.
- 5
If the base remains supported but free edge still folds, compare a more supportive product/length.
What not to do
- Using stronger glue to solve a flexible free edge.
- Heating or reshaping a finished press-on without manufacturer support.
- Reusing a visibly warped nail because its width still matches.
- Ignoring a center gap that leaves the artificial nail unsupported.
Worked troubleshooting example
Example: your long index press-on bends whenever you type, but only beyond the natural free edge. The base remains flush and there is no center gap.
Test a shorter version on that index finger while keeping the same adhesive and prep. If the product is designed to be filed or trimmed, a controlled shortening of the existing tip can serve the same test. If bending stops while the bond behaves the same, length leverage was the useful variable.
If the bend instead occurs over the center of the natural nail, do not keep shortening. Re-check the underside profile for a hollow or rocking fit that is leaving the tip unsupported.
Field notes
This failure pattern is mechanical, so the location of the bend matters. A free-edge bend points toward leverage; a bend over the nail plate points toward support or fit.
A nail that bends but springs back without disturbing the bond can simply be flexible by design. Focus on instability, creasing, repeated lift, or loss of shape rather than flexibility alone.
Frequently asked questions
Are flexible press-on nails bad?
Not necessarily. Some products are designed to flex. Troubleshoot when the flex causes instability, creasing, lifting, or permanent shape change.
Will more glue stop a press-on from bending?
Not if the bend is mainly in the unsupported free edge. Check length, material, and fit first.
Can I reuse a press-on that is warped?
A visibly distorted tip may no longer fit predictably. Follow the product’s reuse guidance and retire a nail that cannot sit correctly.
Sources checked
Sources below are page-specific. We prioritize manufacturer directions for product-specific steps and use medical or dermatology guidance when a safety question requires it. Always follow the instructions for the exact adhesive or set you own.