Why Does My Press-On Thumbnail Look Crooked?
Diagnose a crooked-looking press-on thumbnail by checking nail angle, cuticle alignment, sidewall coverage, tip symmetry, and placement before glue sets.
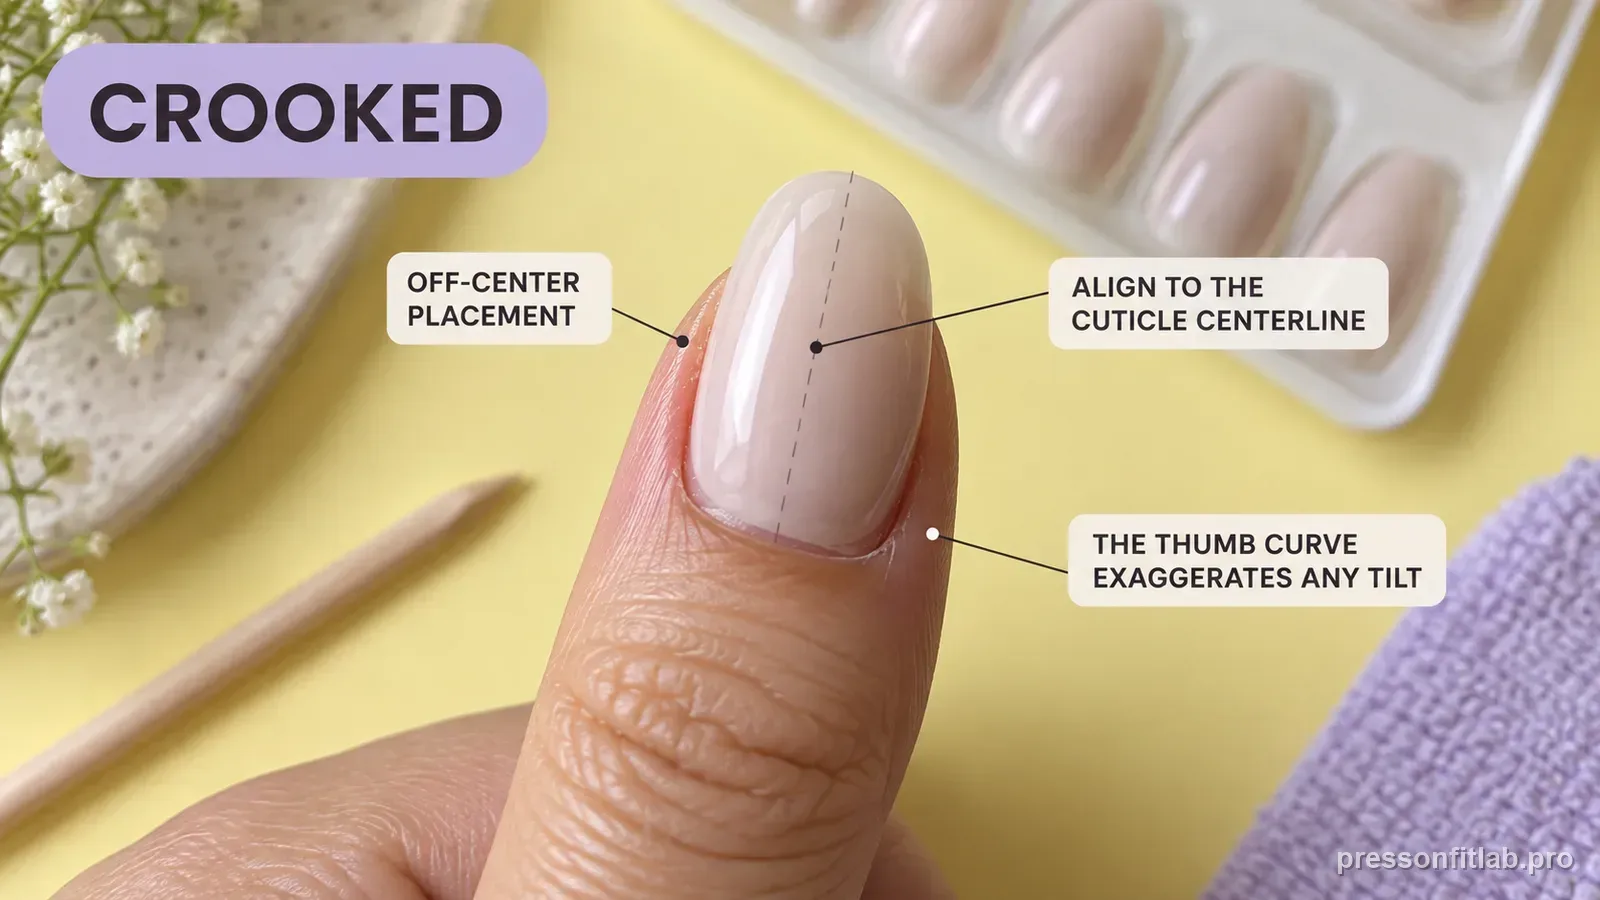
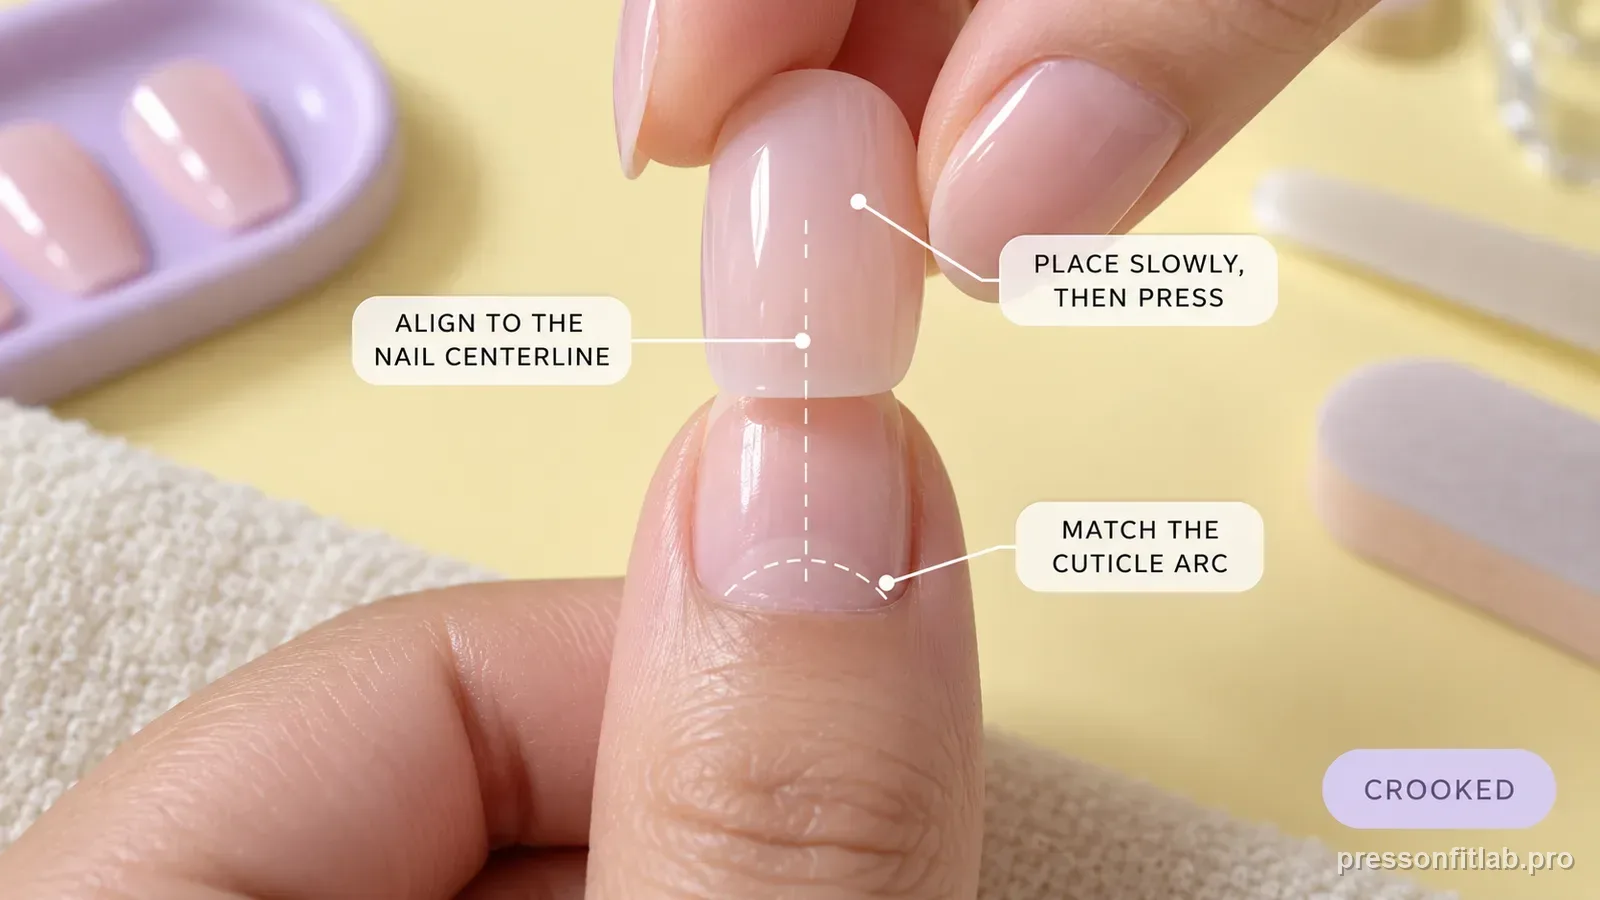
A thumbnail can look crooked even when the press-on itself is symmetrical. Your natural nail, cuticle line, finger axis, and sidewalls may not all point in exactly the same direction. Align the press-on to the nail plate first, not to the room or the fingertip alone. Dry-fit and compare the centerline, sidewall coverage, and cuticle arc before adhesive makes the position permanent.
Check these first
- ✓ Does the natural thumbnail itself angle slightly to one side?
- ✓ Are both sidewalls covered equally?
- ✓ Is the cuticle line asymmetric?
- ✓ Does the tip look crooked only from one viewing angle?
Find the nail plate centerline
Look from the base of the nail toward the free edge and imagine a line through the center of the nail plate. That line is often a better placement reference than the direction the fingertip appears to point.
Hands are not geometrically perfect. A thumbnail can grow at a slight angle relative to the thumb, so making the press-on look “straight” to the finger may actually misalign it on the nail plate.
Check sidewall coverage before rotation
If one side of the natural nail is exposed while the other side of the press-on touches skin, the issue may be size rather than rotation. Moving the tip diagonally can hide one gap but create another.
Choose the tip that gives balanced sidewall coverage, then refine the visual angle within that correct fit.
Use the cuticle arc as a second reference
A press-on base that does not match the natural cuticle arc can make one corner sit higher than the other. That creates the impression of a crooked nail even when the centerline is close.
Test another size first. If the width and curve are already correct and the tip material is designed to be filed, a small manufacturer-supported base-edge refinement may help a near-fit; do not twist the whole tip to force both corners into place.
Place slowly before the adhesive grabs
Fast-setting nail glue can leave little time for alignment. Prepare and lay out the exact thumbnail before opening adhesive, then follow the placement sequence and pressure specified for that product rather than inventing a universal angle.
If you routinely need multiple placement attempts, work one nail at a time and reduce the number of moving parts in the routine.
Accept useful asymmetry
A perfectly centered press-on can still look slightly different on the left and right thumbs because the natural nails differ. The goal is stable coverage and a visually balanced result, not mathematical mirror symmetry.
Photos taken straight over each thumb can help you compare alignment more reliably than rotating your hands in the mirror.
Use three reference lines, not the fingertip alone
Thumbs often create a visual conflict because the fingertip direction, nail-plate centerline, and cuticle arc are not perfectly parallel. Start by finding the center of the natural nail plate from base to free edge. Then compare sidewall coverage. A press-on that follows the fingertip direction but leaves one sidewall exposed is visually straight to the finger yet mechanically off-center on the nail.
The cuticle arc is the third reference. If the press-on is centered but one base corner sits high, the issue may be base geometry rather than rotation. If the product allows filing, a very small artificial-edge refinement can sometimes improve a near-fit; rotating the whole nail to hide it can create a larger sidewall problem.
Know when a little asymmetry is the better fit
A natural thumbnail can grow with a slight lateral angle. In that case a correctly centered press-on may appear to point a little outward or inward when compared with the thumb itself. Stability should follow the nail plate, not a cosmetic attempt to force the artificial tip into a perfectly straight finger axis.
Take a straight-on photo before adhesive and compare it with a photo from the free edge. If width, curve, and base contact are good, a small visual angle can be normal for that thumb. Save the orientation as a thumb-specific note so you do not 'correct' the same natural asymmetry on every new set.
Compare both thumbs before deciding what “straight” means
Place the left and right thumb tips without adhesive and photograph them from the same angle. If both nail plates naturally point slightly away from the finger axis, that becomes part of your baseline. If only one press-on looks rotated while the underlying nail plate does not, the issue is more likely placement, size, or base shape.
This side-by-side check is especially useful when the thumbs use different sizes. A larger shell can visually exaggerate rotation because its sidewalls extend farther toward the skin. Re-center first, then refine artificial edges only if the width is genuinely correct and the tip material is intended to be filed.
Diagnostic table
| What you see | What it suggests | Next check |
|---|---|---|
| One side exposed, other side on skin | Size/width mismatch | Refit before rotating |
| Both sides covered but tip points off-axis | Placement or natural nail angle | Align to nail-plate centerline |
| One cuticle corner sits high | Base arc mismatch | Test another size; refine only a near-fit base when the product allows filing |
| Looks crooked only compared with other thumb | Natural asymmetry | Judge each thumb on its own plate |
A controlled test plan
- 1
Dry-fit the thumbnail and mark the nail-plate centerline mentally.
- 2
Photograph the top view before adhesive.
- 3
Confirm balanced sidewall coverage and cuticle fit.
- 4
Apply one thumbnail slowly using the product placement directions.
- 5
Compare the finished result to the pre-application dry fit rather than to the other hand.
What not to do
- Twisting a too-small tip to hide a side gap.
- Aligning only to the fingertip and ignoring the nail plate.
- Using adhesive before the correct thumbnail is laid out.
- Over-filing one side to manufacture visual straightness.
Worked troubleshooting example
Example: the press-on appears to lean outward. Looking closer, both sidewalls are covered evenly, but your natural thumbnail itself grows slightly outward from the thumb. Rotating the press-on inward would make the artificial nail look straighter to the finger but would expose one sidewall.
Keep the tip centered on the nail plate instead. If the cuticle edge then looks uneven, compare the neighboring size. Only if the tip is otherwise a comfortable near-fit and its material is designed to be filed should you make a small base-edge refinement.
The finished thumbnail may not point exactly where the thumb points, and that can still be the correct, stable placement.
Field notes
A crooked appearance is often a geometry problem with several possible reference lines. Centerline, cuticle arc, sidewalls, and fingertip direction can disagree slightly on the same thumb.
If the thumbnail repeatedly shifts during glue application, excess adhesive or late alignment can contribute to sliding on some systems. Follow the product-directed amount and placement sequence, and compare the finished position with the dry-fit baseline.
Frequently asked questions
Should I align a press-on to my finger or my natural nail?
Use the natural nail plate and balanced sidewall coverage as the primary reference.
Can an uneven cuticle make a press-on look crooked?
Yes. A mismatched base arc can make one corner sit higher and change the visual angle.
Why does my press-on shift crooked while I am gluing it?
The tip may be sliding before the adhesive sets. Prepare the correct size first and avoid excess glue that makes placement harder to control.
Sources checked
Sources below are page-specific. We prioritize manufacturer directions for product-specific steps and use medical or dermatology guidance when a safety question requires it. Always follow the instructions for the exact adhesive or set you own.