Adhesive Tabs Feel Too Thick Under Press-Ons: What to Check
Fix a bulky or raised press-on caused by adhesive tabs by checking tab size, curve mismatch, placement, trapped air, and whether tabs suit the intended fit.
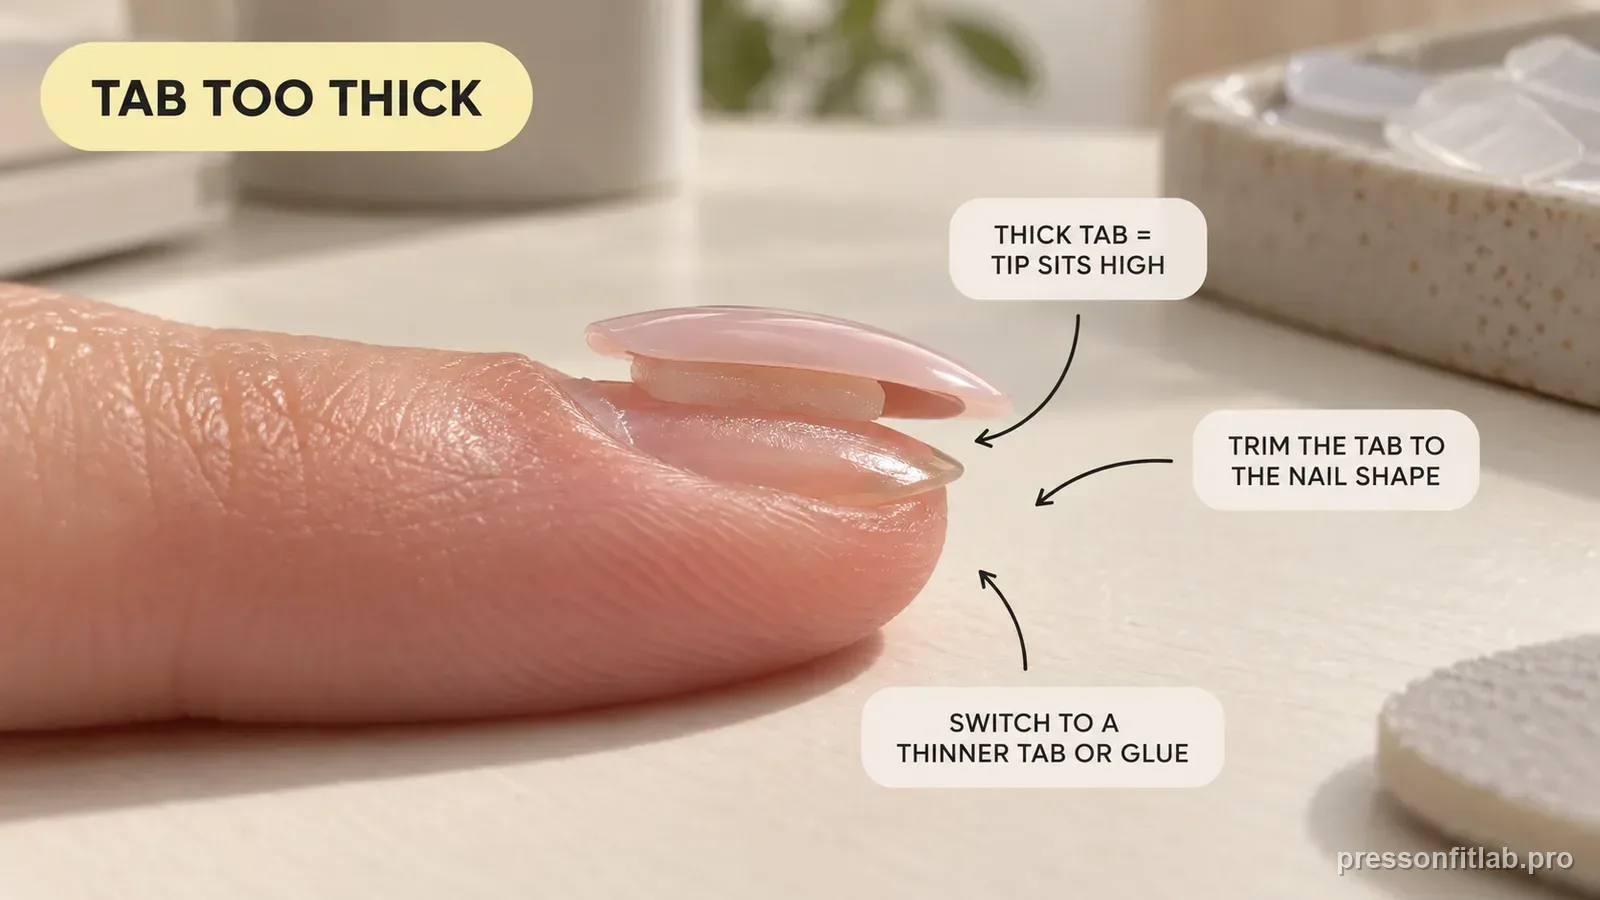
If adhesive tabs make press-ons sit visibly high, first confirm the tab is appropriately sized, smooth, kept off skin, and placed on the surface the exact system specifies. A raised result can also reveal that the tip and natural nail profiles do not meet closely. A slight added layer may be normal for that tab system if the fit is stable and comfortable, but do not stack tabs or use them to force a rocking tip.
Check these first
- ✓ Does the tab extend beyond the intended bonding area or touch skin?
- ✓ Is the press-on already rocking before the tab is applied?
- ✓ Is there a visible air pocket under the center?
- ✓ Does the added height come from one finger or the entire set?
First check whether the tab is simply too large
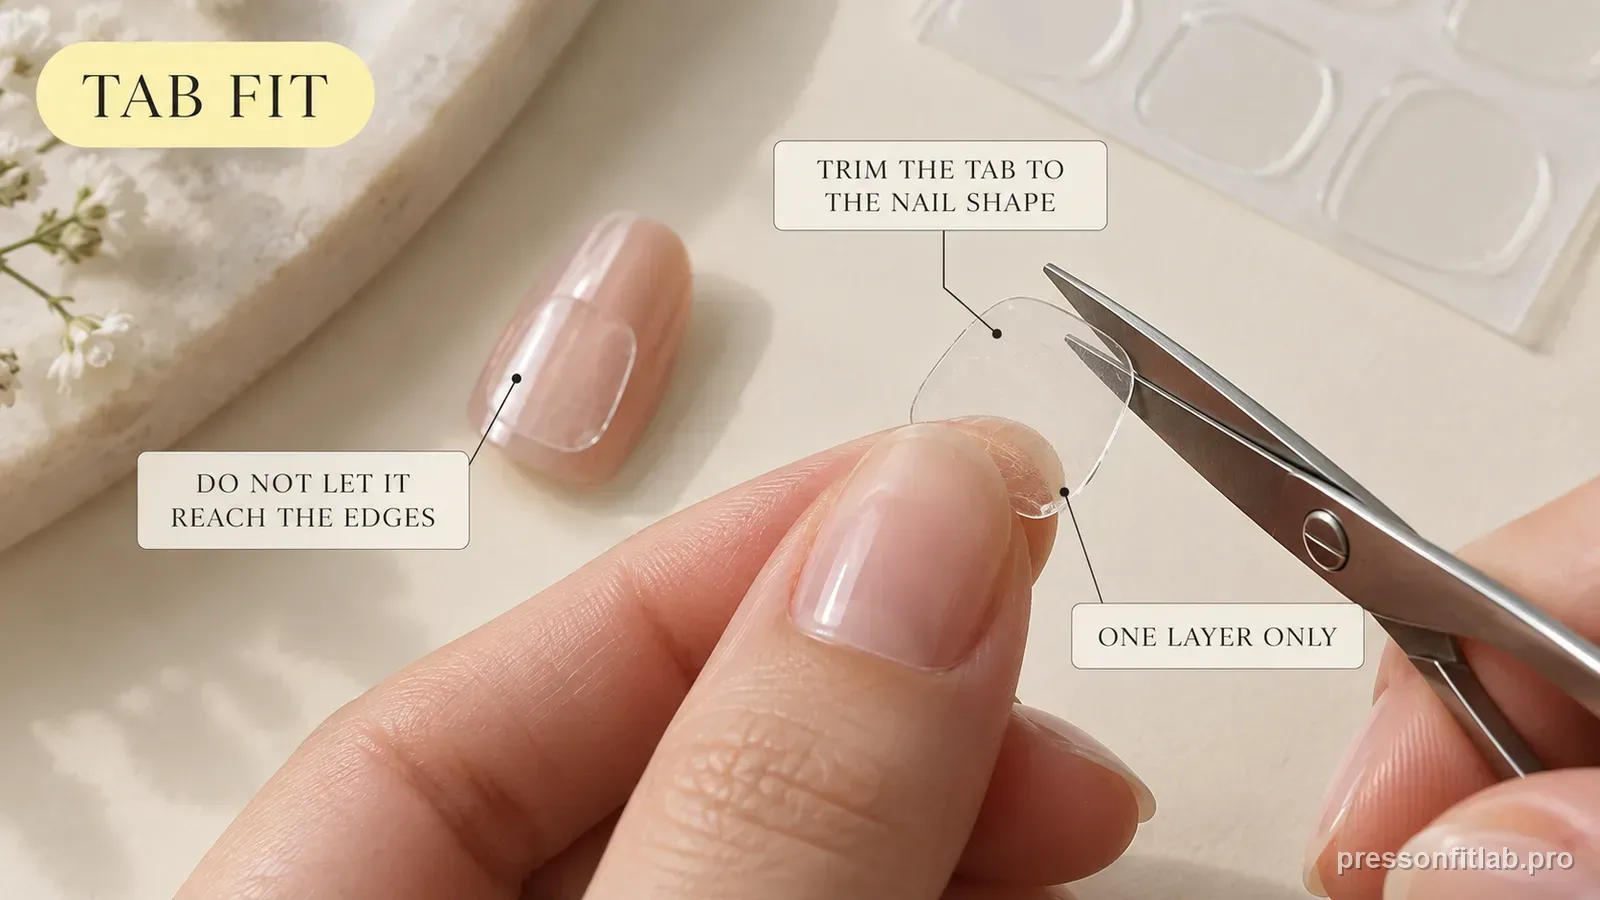
Adhesive tabs are usually offered in multiple sizes. A tab that reaches onto skin or protrudes beyond the intended bonding footprint can create a gummy ridge and make cleanup difficult. Match the tab size and placement to the exact system directions rather than assuming the largest tab gives the strongest hold.
Press and smooth the tab so it makes uniform contact before removing its backing. Wrinkles can create localized thickness that looks like a bump under a translucent nail.
A thick tab can expose a curve mismatch
Flexible tabs can cushion small contour differences, but a press-on that already rocks or leaves a pronounced hollow during dry fit is still a profile problem. The tab may simply mask part of that space and make the manicure sit higher.
If visual height, rocking, or pressure remains, compare the natural and artificial arcs directly and test a closer profile. Adhesive should support a near-fit, not disguise a large mismatch.
Follow the system-specific tab placement sequence
Tab placement is not universal. Glamnetic currently directs users to place its adhesive tab on the natural nail, while KISS Majestic and ICON directions place the tab on the underside of the artificial nail. Use whichever surface and sequence your exact product specifies, then smooth the tab and remove its backing as directed.
Keep fingers away from exposed adhesive as much as practical so you do not add oils or stretch the tab unevenly.
Do not stack tabs to fill space
Stacking adhesive tabs may seem like a way to fill a hollow center, but it introduces another interface that can slide, trap air, or change the angle of the press-on. It also makes the fit harder to diagnose.
If one tab is not enough to produce broad contact, go back to width and curve. A different tip profile is the cleaner variable to test.
Decide whether the height is actually a problem
An adhesive tab adds a physical layer, so the profile can look or feel different from a glue application. Judge the result by comfort, stable contact, and the manufacturer’s intended method rather than expecting every tab system to sit exactly like glue.
If the nail feels unstable, catches at the cuticle, or visibly rocks, treat that as a fit problem rather than a cosmetic preference.
Diagnostic table
| What you see | What it suggests | Next check |
|---|---|---|
| Tab shows beyond intended bond area | Tab is too large or off-center | Choose a smaller tab and place it according to the exact system directions |
| Center looks domed | Tab height and/or profile mismatch | Check tab placement, then compare the arcs and another profile. |
| One side is raised | Tab wrinkled or placement shifted | Smooth a fresh tab evenly before applying tip |
| Whole set sits slightly higher but stable | System characteristic may be normal | Compare with manufacturer directions and comfort |
A controlled test plan
- 1
Dry-fit the press-on with no adhesive and note any rocking.
- 2
Choose the tab size and place it on whichever surface the exact system specifies, keeping adhesive off skin.
- 3
Apply and smooth one fresh tab from center outward.
- 4
Apply the same press-on and compare height with the dry-fit gap.
- 5
If the center remains excessively raised, test a better-matched curve instead of stacking tabs.
What not to do
- Stacking two or more tabs to fill a large hollow.
- Using a tab that overlaps skin.
- Blaming tab thickness before checking press-on curve.
- Stretching or repeatedly repositioning a tab after its adhesive surface is contaminated.
Worked troubleshooting example
Example: an index press-on has only a small contour difference during dry fit. With the single tab size recommended for the system, it sits slightly higher but remains stable and comfortable.
The thumb, however, has a large hollow and visibly teeters before adhesive. A tab makes it look domed but does not make the contact stable. Do not add a second tab; compare another thumbnail profile at a similar width.
You have separated a small contour difference the tab system can accommodate from a larger mismatch that needs a different tip.
Field notes
Glamnetic’s current application guidance specifically positions adhesive tabs as a short-wear option and notes their flexible fit. That makes tabs useful for small contour differences, but it does not remove the need for correct tip sizing.
For translucent press-ons, tab edges or trapped air may be more visible. Careful centering and smoothing matter as much cosmetically as they do for bond contact.
Frequently asked questions
Are adhesive tabs supposed to add height under press-ons?
Some tabs add a small cushioned layer. Excessive height, rocking, or a visible hollow suggests you should re-check tab size and press-on curve.
Can I stack adhesive tabs?
It is better not to use stacked tabs as a fix for a major gap. Test a more compatible press-on profile.
Should the adhesive tab cover my whole natural nail?
Do not use a universal placement rule. Follow the exact system: some place the tab on the natural nail, while others place it on the artificial nail. In either case, keep adhesive off surrounding skin and within the intended bonding area.
Sources checked
Sources below are page-specific. We prioritize manufacturer directions for product-specific steps and use medical or dermatology guidance when a safety question requires it. Always follow the instructions for the exact adhesive or set you own.