Why Does My Pinky Press-On Nail Keep Popping Off?
Diagnose repeated pinky failures by checking tiny width errors, high curvature, edge impacts, and incomplete adhesive contact.
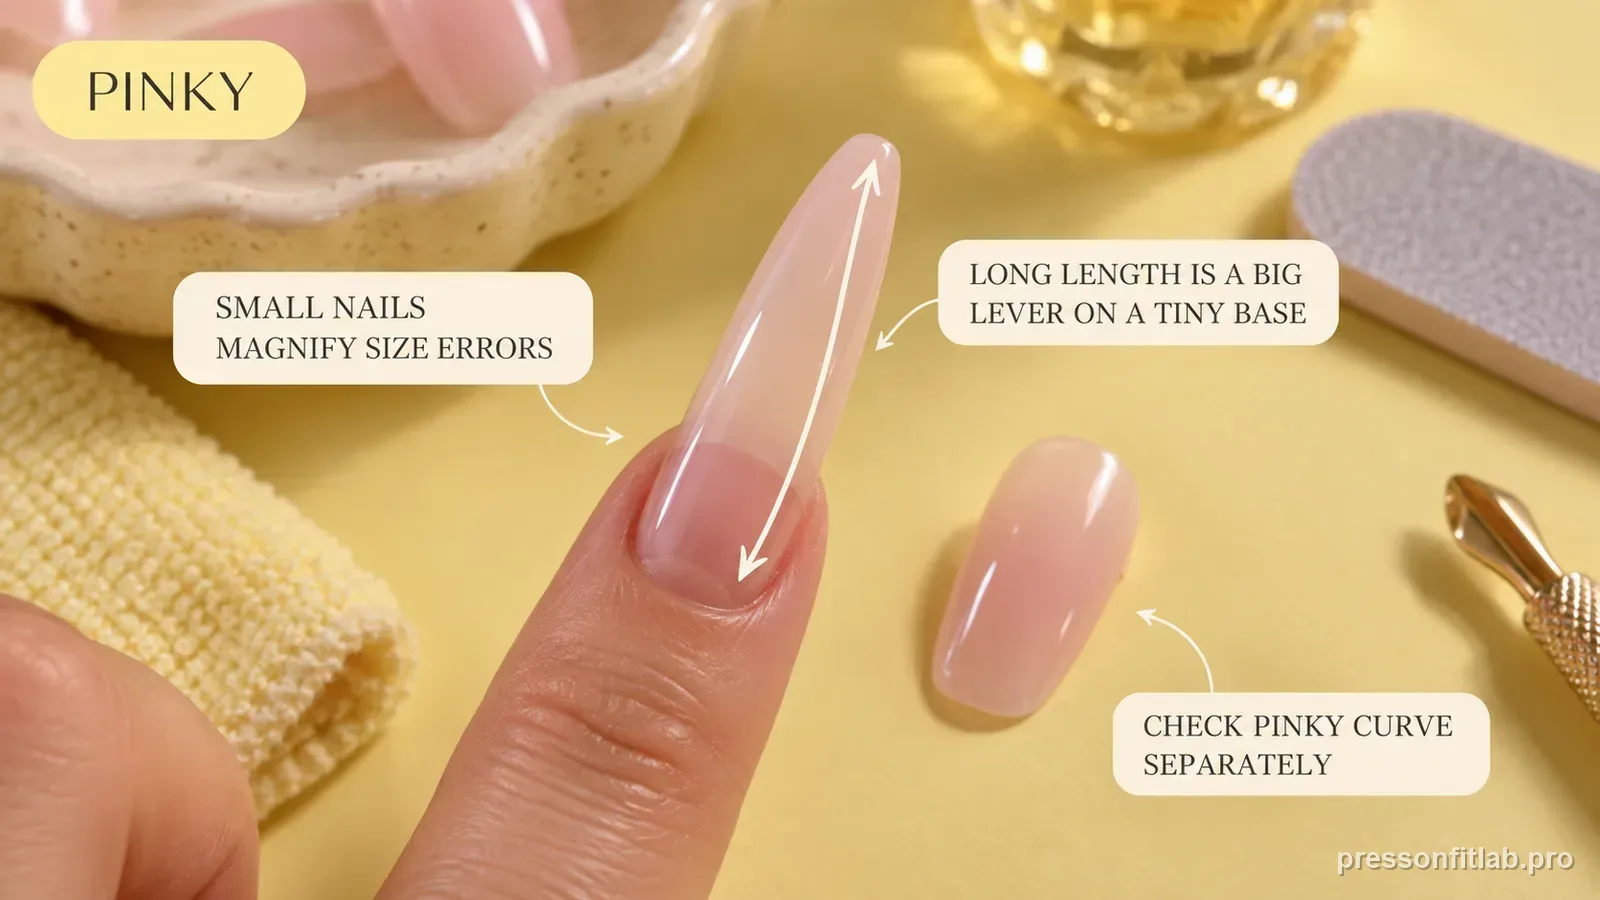
A pinky press-on can fail while the other nine nails hold because the little nail has a small bonding area and is generally among the more transversely curved fingernails. That leaves little margin for width or curve error. Check curve, skin overlap, glue-transfer pattern, and free-edge leverage before adding more adhesive.
Check these first
- ✓ Does the pinky shell rock when you press its center?
- ✓ Is even a small edge sitting on side skin?
- ✓ Does one side lift before the other?
- ✓ Is the pinky extension proportionally longer than the other nails?
- ✓ Does the failed shell show a dry zone where glue never contacted?
Small nails magnify small size errors
A fraction of a millimeter that is trivial on a thumb can occupy a meaningful share of a pinky nail. Slight oversizing creates skin contact; slight undersizing leaves exposed or tensioned sidewalls.
Because the pinky plate is small, the same absolute overhang represents a larger percentage of the available width. A shell that extends only slightly beyond skin on a thumb may be obviously oversized on a pinky. Use magnification or a close phone photo if necessary; tiny lateral errors are easier to see before glue than after repeated pops.
Pinky curvature deserves a separate check
Research measuring healthy adult nails found the little fingernail generally more transversely curved than the larger digits. A shell chosen by width alone can therefore bridge or spring at the sides.
The curvature literature is nuanced: one study found curvature differences by digit, and the exact ranking can depend on measurement method. Do not force a population average onto one person. The useful takeaway is simply that the pinky may require its own curve check rather than inheriting the ring finger's shell family.
Long length creates a large lever on a tiny base
A long artificial pinky can extend far beyond a short natural plate. Snags on clothing, bedding, pockets, or bags then transfer torque into a small adhesive footprint.
After a pop, preserve the underside long enough to read the glue print. A central island of adhesive with clean sides suggests those sides never contacted well. Adhesive covering the whole underside plus a sudden failure after a snag points more toward dynamic leverage. The shell itself becomes a record of what happened.
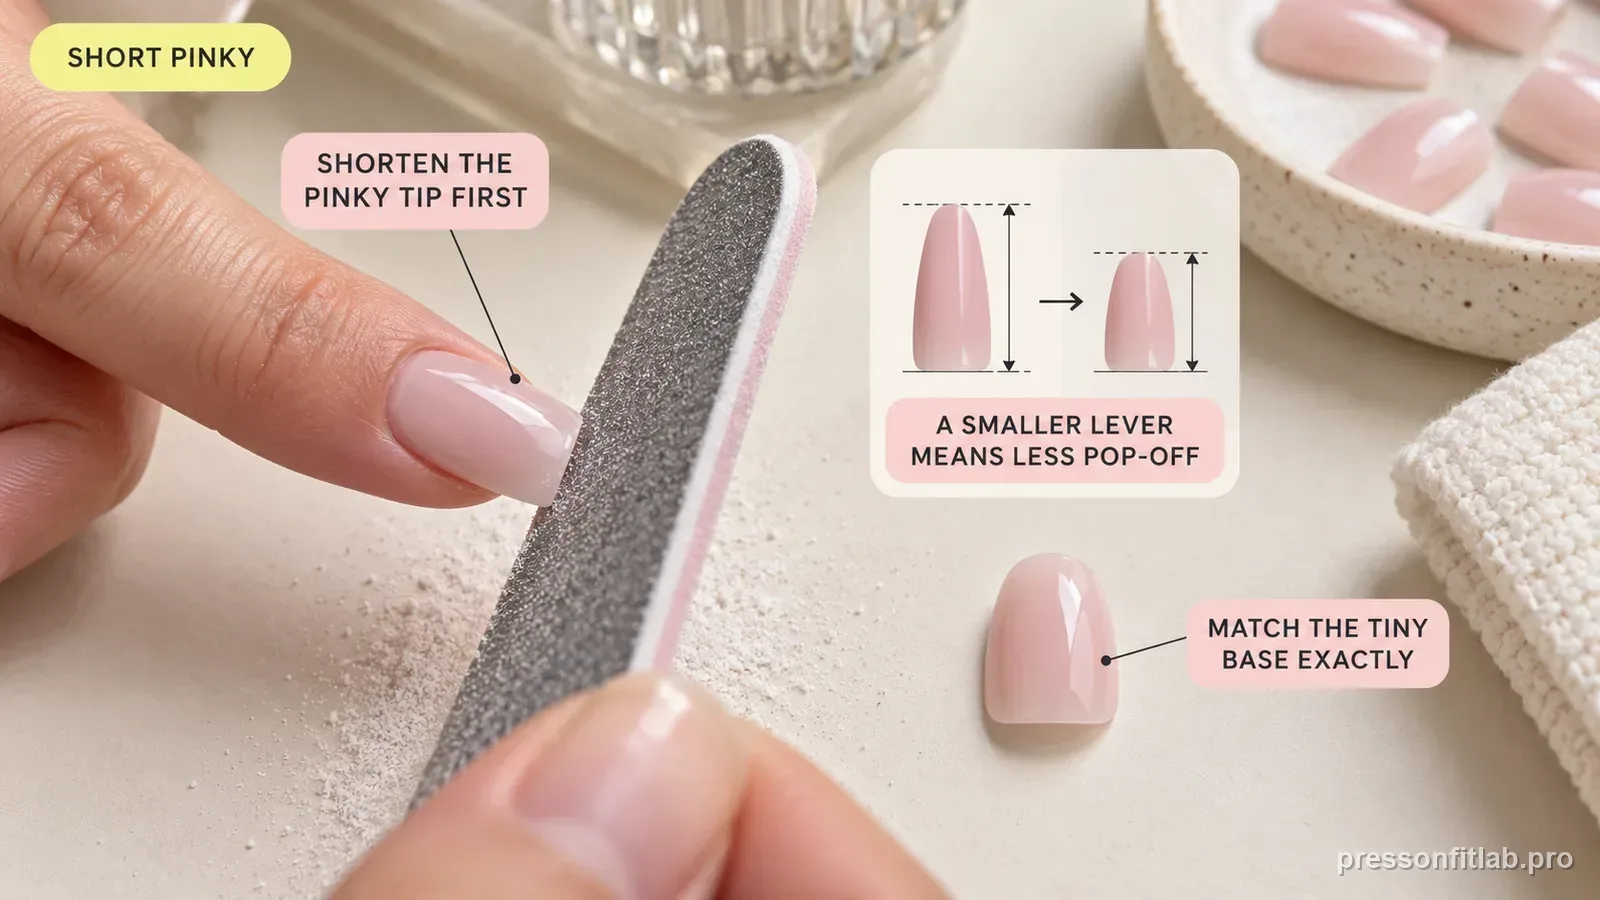
Read the glue print after failure
Before cleaning the shell, inspect where cured adhesive actually touched. A repeated dry crescent or clean sidewall suggests incomplete contact; a fully contacted shell that fails after catches points more strongly to leverage.
Pinky length should be judged relative to the fingertip, not by the set label. A ‘medium’ pinky can project farther beyond its own natural plate than a ‘long’ thumb does proportionally. If the pinky is your only recurring failure, shortening that one finger often provides a cleaner test than downgrading the entire set.
Application pressure has to reach the tiny edges
It is easy to press only the center because one fingertip covers almost the whole pinky shell. Align first, then keep both sidewalls seated for the manufacturer-specified press interval without sliding the tip.
Watch incidental contact during ordinary tasks such as sliding a hand into a pocket or carrying a bag. The outermost finger can be the first to brush walls, fabric seams, and object edges. These repeated sideways knocks create peel at one sidewall, which is mechanically different from a centered downward press.
A one-finger failure is local evidence
If nine nails hold and only the pinky fails, a whole-hand prep failure is less likely. Audit the pinky geometry and daily contact pattern before changing the entire manicure routine.
If the same pinky still fails after curve, width, and length are corrected, then move to local prep variables: residual cuticle, oil, or incomplete glue coverage on that tiny plate. Keeping the investigation local avoids unnecessary aggressive prep on nine nails that were already performing well.
Diagnostic table
| What you see | What it suggests | Next check |
|---|---|---|
| Pinky fails while other nine hold | Finger-specific fit or leverage issue | Audit pinky width, curve, and length |
| Both sides spring upward | Shell too flat for the pinky | Try a more curved or flexible tip |
| One edge rests on skin | Slight oversizing | Downsize or carefully refine artificial edge |
| Failure follows repeated catches | Excessive free-edge leverage | Shorten the pinky shape |
| Dry patch remains under failed shell | Incomplete adhesive contact | Correct fit/contact instead of adding random extra glue |
A controlled test plan
- 1
Dry-fit the current shell and inspect from the free edge.
- 2
Compare one neighboring size and reject skin overlap.
- 3
Apply a shorter pinky while keeping prep and glue unchanged.
- 4
If it fails, inspect the glue-transfer pattern before cleaning.
- 5
Use the first lift location to choose the next single variable.
What not to do
- Flooding the smallest nail with glue
- Assuming pinky curve matches the ring finger
- Keeping extra-long pinkies during troubleshooting
- Aggressively filing the natural pinky plate
- Changing all ten nails for a one-finger problem
Worked troubleshooting example
Sofia added more glue every time her pinky popped, but the extra product only squeezed onto skin.
A free-edge dry fit showed the shell was too flat. She chose a more compatible curve and shortened the pinky slightly while keeping the rest of her process unchanged.
The next application stayed attached without extra glue, confirming a local geometry-and-leverage problem rather than weak adhesive throughout the set.
Field notes
A repeatedly failing pinky is an excellent candidate for side-view inspection; the top-view width can look correct while the transverse curve is clearly wrong.
The ratio of artificial length to bonded nail-bed length matters more than absolute extension millimeters on this finger.
Frequently asked questions
Should I size up a pinky when between sizes?
Only if the larger shell can be refined without skin overlap and its curve is compatible. Nominal size matters less than neutral contact.
Why does the pinky pop when I reach into pockets?
A longer artificial edge can catch and apply torque to the small bonded base.
Does a curved pinky need more glue?
No. A large curve gap should be solved with a better-fitting shell, not a reservoir of adhesive.
Sources checked
Sources below are page-specific. We prioritize manufacturer directions for product-specific steps and use medical or dermatology guidance when a safety question requires it. Always follow the instructions for the exact adhesive or set you own.