Press-On Nails for Curved Nail Beds: Match the C-Curve Without Side Gaps
Fit press-ons to curved nail beds by checking underside profile, center contact, sidewall contact, and spring-back before adhesive is added.
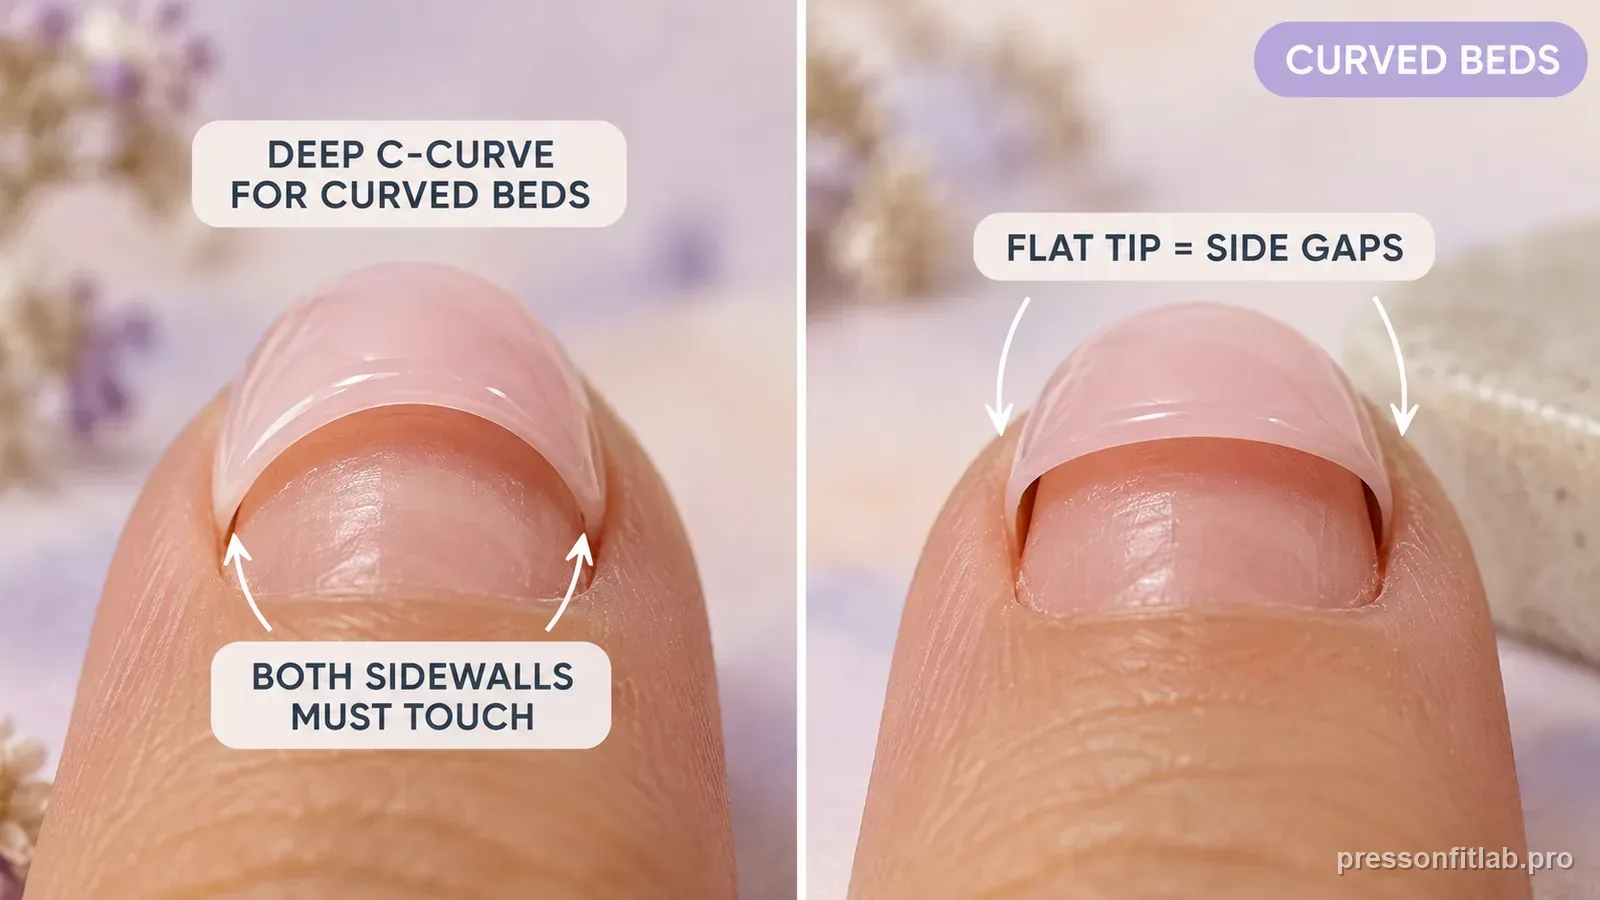
For curved nail beds, width alone can be misleading. Compare the natural nail and press-on arcs directly from the free edge, then look for broad relaxed contact without rocking, spring-back, or force. A persistent center or side gap is evidence of mismatch, but its location alone does not prove whether the tip needs more or less curve.
Check these first
- ✓ From the free edge, do the sidewalls and center contact at the same time?
- ✓ Does the tip spring away when you stop pressing?
- ✓ Are side gaps visible even though top-view width looks correct?
- ✓ Does the cuticle edge follow the same arc as your natural nail?
Curvature is a third sizing dimension
Press-on fit is often discussed as if nails have only width and length. The underside curve adds another dimension. A highly curved natural nail can make a flatter artificial tip look wide enough from above while still failing to meet the sidewalls cleanly.
Use the free-edge view during dry fitting. It shows whether contact is concentrated in the center, the sides, or broadly across the plate.
What a too-flat tip looks like
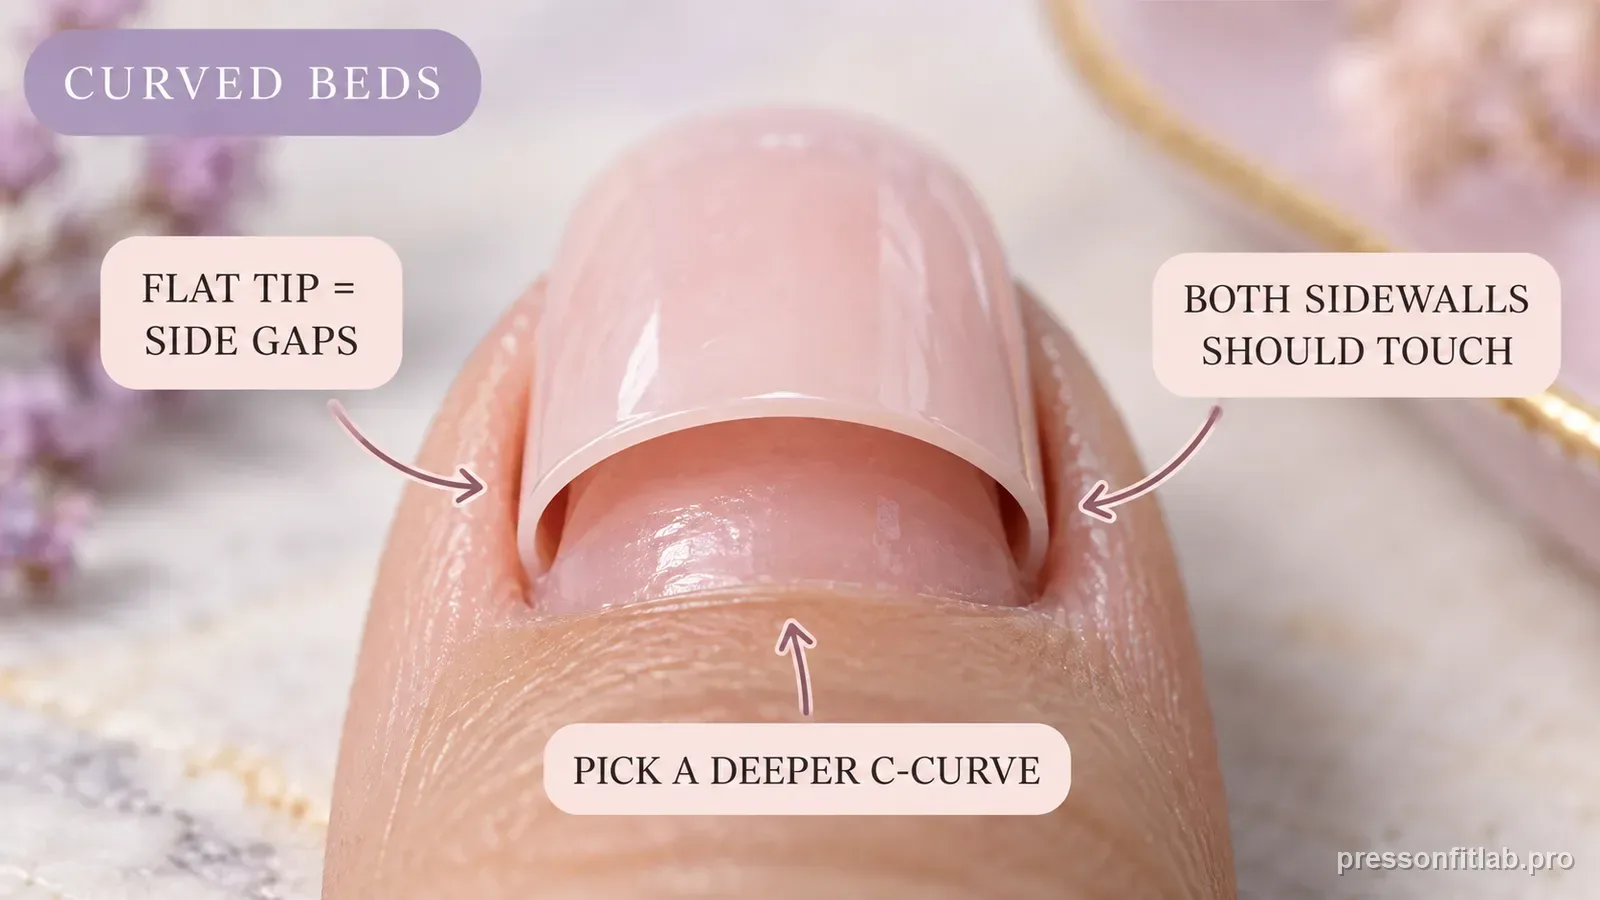
A press-on is meaningfully too flat when its transverse arc is visibly shallower than the natural nail and it will not rest with broad, comfortable contact. Depending on shell flexibility, longitudinal profile, width, and pressure, the mismatch can appear as a side gap, center hollow, rocking, or shifting.
Do not use gap location alone to assign the direction. Compare the arcs directly and test a similarly wide profile that follows the natural curve more closely. Adhesive should bond a near-fit, not bridge a large geometry mismatch.
Do not confuse narrow width with strong curve
A curved nail can look narrow from above because more of its width wraps downward. If you size only by a straight top view, you may choose a tip that is too small. Measure consistently and compare with the sizing method used by the brand.
If you use flexible tape over the curve, remember that the measurement is different from a straight horizontal caliper measurement. Do not mix those methods casually.
Use light pressure as the dry-fit standard
A matching curve should not require you to clamp the press-on into place. Strong finger pressure can temporarily hide a mismatch and store tension in the artificial nail. When released, that tension can work against the adhesive bond.
Look for a tip that stays aligned with relaxed, light positioning pressure before you commit to glue or tabs.
Check each finger for a different curve
Thumbs often have a different profile from the other nails, and one hand can differ from the other. A successful set may use the same width number on two fingers but a different mold or customization on one outlier.
If a particular finger always develops a side gap, record that pattern instead of changing the application routine for the entire hand.
Use a free-edge contact map
Look at the dry-fitted nail from the fingertip and note where contact is incomplete or the shell pivots. Treat that pattern as a map of instability, not as a universal code for 'too flat' or 'too curved.'
Then compare another profile with similar width and a visibly closer arc. A better match should reduce rocking and forced pressure; this is cleaner than changing width and curve together.
Use flexibility as a close-fit aid, not a cure for a large mismatch
A flexible tip or adhesive system may tolerate a small difference in profile, but flexibility should not be used as a spacer or a way to force a visibly mismatched shell onto the nail. If the tip springs back, pinches, rocks, or leaves a persistent hollow area, choose a closer profile instead of relying on adhesive thickness.
For reusable nails, inspect the curve again after removal. Heat, stress, aggressive cleanup, or storage pressure can change the underside enough that a previously compatible tip behaves flatter on the next wear.
Record the curve separately from width
A useful fit note might say “right middle: 13 mm, stronger curve” rather than only “size 4.” That separates a portable width measurement from a mold-specific profile observation. When you try another brand, start with the 13 mm range but actively look for the same contact pattern from the free edge.
This record prevents a common loop where a user keeps changing sizes to solve a curve problem. If two tips have similar width but only one follows the center and sidewalls together, the profile difference is the information worth saving.
Diagnostic table
| What you see | What it suggests | Next check |
|---|---|---|
| Sides remain away from nail | Incomplete contact / possible profile mismatch | Compare the arcs directly and test a closer profile. |
| Tip shifts despite correct width | Contact area is limited | Inspect free-edge profile before changing adhesive |
| Press-on must be squeezed hard | Curve mismatch/tension | Reject the fit rather than clamping it |
| Only one finger develops side gap | Finger-specific curve | Refit that finger independently |
A controlled test plan
- 1
Dry-fit without adhesive and view the nail from the free edge.
- 2
Press lightly in the center and observe whether sides follow naturally.
- 3
Compare one alternative profile at the same approximate width.
- 4
Keep prep and adhesive constant during the test.
- 5
Photograph the successful free-edge fit for future reference.
What not to do
- Using strong pressure to force a flat tip around a curved nail.
- Sizing down only because the nail looks narrow from above.
- Mixing tape-over-curve measurements with straight-width charts.
- Adding extra glue before checking profile geometry.
Worked troubleshooting example
Example: a tip covers your sidewalls from above but rocks during dry fit and needs pressure to settle. From the free edge, its arc is visibly shallower than your natural nail.
You compare a similarly wide tip with a closer curve. It rests with broader contact and less force, so you keep width and adhesive unchanged for the controlled test.
The decisive clue was the direct arc comparison plus relaxed contact—not the location of one gap by itself.
Field notes
Curved nail beds are the mirror image of the flat-bed problem: the key question is still where contact occurs. A simple free-edge view often reveals more than repeated changes in glue amount.
Do not use adhesive-tab thickness to compensate for an obvious curve mismatch. Follow the product’s own tab or glue directions only after the dry fit already shows broad, comfortable contact.
Frequently asked questions
How do I know if my nail beds are curved?
Look from the free edge. A stronger natural C-curve wraps downward more noticeably from center to sidewalls.
Are press-ons supposed to bend around curved nails?
They should match closely enough to sit with broad contact. Do not rely on strong bending or clamping to force the fit.
Why do I get side gaps with the correct width?
A too-flat underside profile is one possible reason. Check curve from the free edge before increasing adhesive.
Sources checked
Sources below are page-specific. We prioritize manufacturer directions for product-specific steps and use medical or dermatology guidance when a safety question requires it. Always follow the instructions for the exact adhesive or set you own.