Can You Apply Press-On Nails Over a Gel Manicure?
Understand why bonding to cured gel differs from bonding to bare nail and how to locate the layer that actually failed.
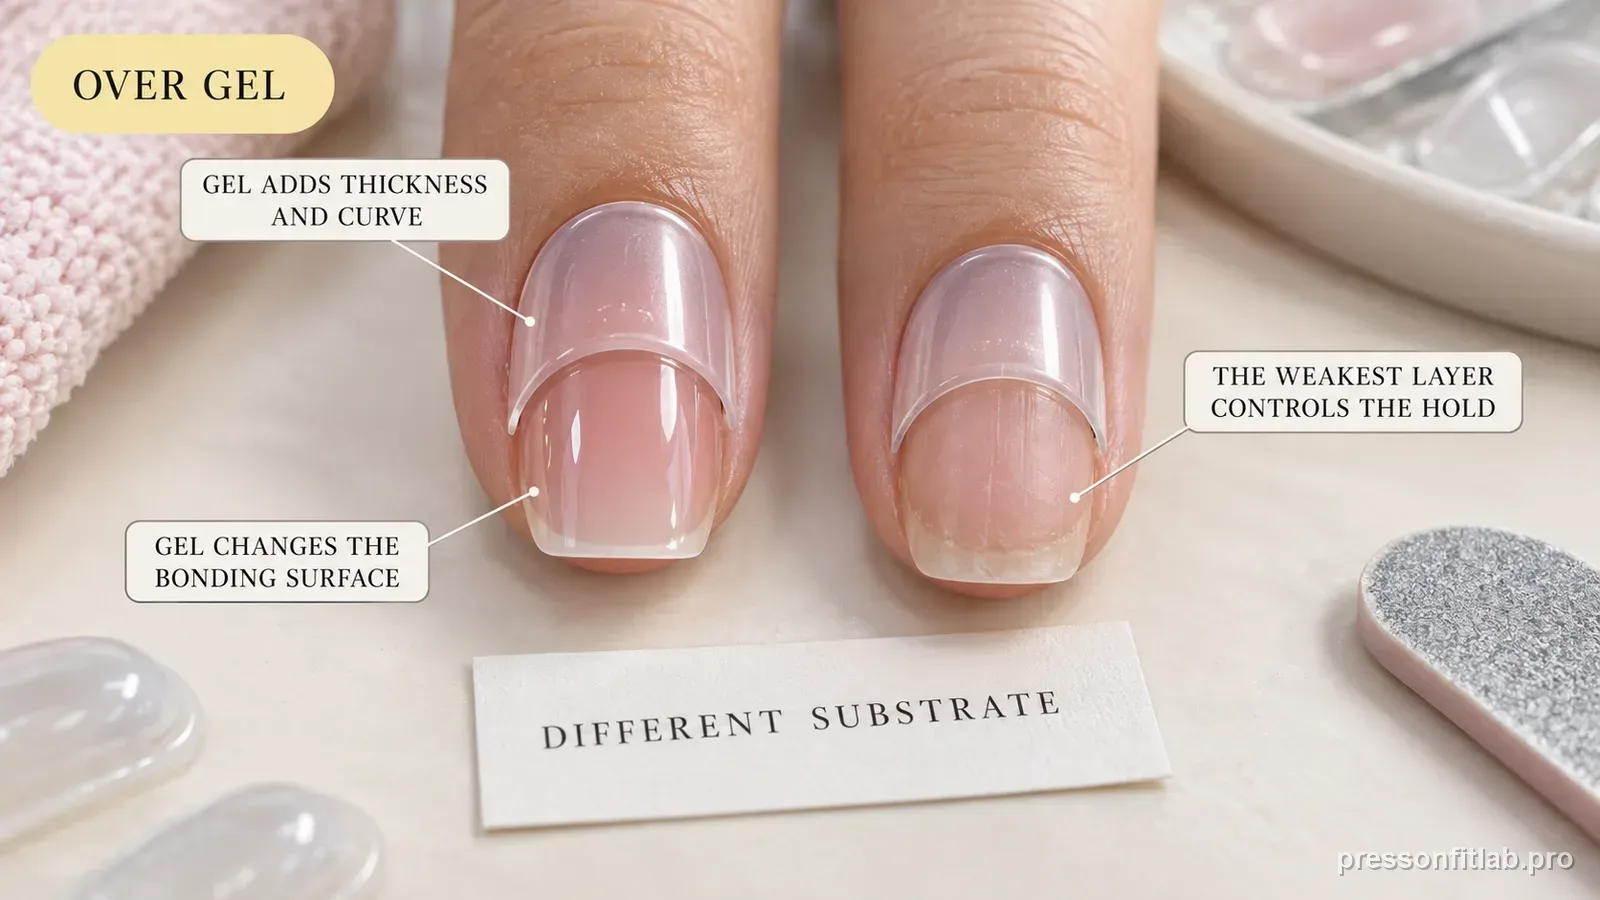
You can physically bond a press-on to cured gel, but it is not the standard bare-nail surface specified by many press-on systems. The final hold depends on both the press-on-to-gel interface and the gel-to-natural-nail interface. If you deliberately test the method, use only sound, fully attached gel, re-check the altered nail geometry, and do not cover pre-existing gel lifting.
Check these first
- ✓ Is the gel fully cured and attached with no lifted edges?
- ✓ Has the gel apex changed how the press-on sits?
- ✓ Does the press-on rock even before adhesive is added?
- ✓ If failure occurs, can you tell whether glue separated from gel or gel separated from nail?
- ✓ Does the press-on manufacturer specifically call for polish-free bare nails?
You have changed the bonding substrate
Standard press-on instructions commonly start with clean, polish-free nails. With cured gel underneath, nail glue is bonding to a coating rather than directly to the prepared natural nail, so an extra interface has been added.
Think of the manicure as a chain of interfaces. Even a perfect glue-to-press-on bond cannot exceed the weakest connection below it. If the gel top coat is slick, the upper interface may fail; if the gel is already lifting, the lower interface can fail while the press-on and glue stay firmly attached to the detached gel fragment.
The weakest layer controls the result
A strong press-on-to-gel bond cannot rescue gel that is already lifting from the natural nail. If the whole assembly releases with gel attached to the underside of the press-on, stronger nail glue was never the missing variable.
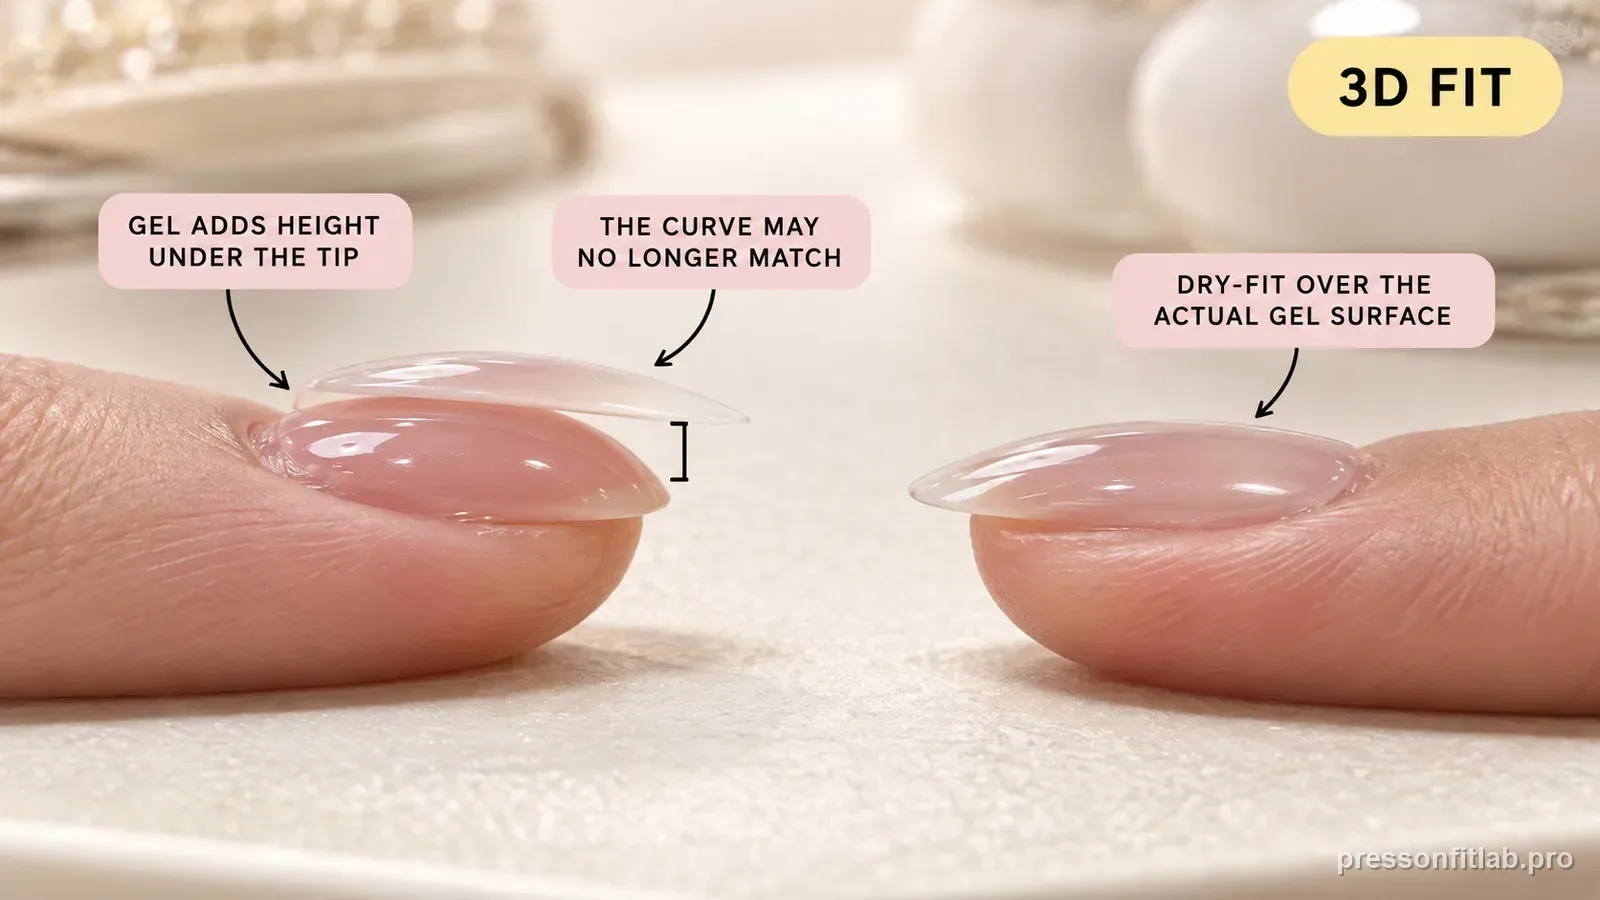
A structured gel overlay can also move the highest point of the nail upward and slightly forward. That changes where a rigid press-on first touches. During dry fit, use a side view: if the shell contacts only the apex while the cuticle zone and distal plate hover, you have an interior-volume mismatch rather than an adhesive-prep problem.
The gel surface and the bare nail need different handling
Gel systems use their own preparation and removal procedures, and dermatology guidance warns against damaging the natural nail through repeated aggressive filing. If you intentionally test over gel, avoid drilling or thinning through the coating merely to create grip.
Surface prep over cured gel should be conservative because the goal is only to control the surface you intend to bond, not to thin through the manicure. If repeated filing is needed to make the press-on sit flat, stop and change shell geometry. Removing material to force compatibility makes the experiment harder to reproduce and can compromise the underlying manicure.
Gel also changes three-dimensional fit
A structured manicure can add apex height, sidewall width, or curvature. Re-size all ten nails from the finished gel surface because a shell that fit the bare nail may now contact the apex first and float at the ends.
Hold-time expectations also change diagnostically because you are no longer following the exact substrate assumed by most consumer press-on directions. That means you should resist making promises about wear duration. A one-finger pilot test provides better evidence than assuming a brand's bare-nail claim transfers unchanged to cured gel.
Read the failed layers before cleaning them
If gel remains intact and the press-on releases from its surface, the top interface is implicated. If gel comes away with the press-on, the underlying manicure failed. This evidence is more useful than simply saying the press-on popped off.
After removal, photograph the failed stack before cleaning. Gel remaining perfectly continuous on the natural nail plus glue residue on the press-on suggests the top interface released. A colored or clear gel fragment bonded to the press-on means the failure happened below the glue. Those two outcomes call for different fixes.
Use bare-nail application when predictability matters most
If long wear is the goal, returning to the surface specified by the press-on brand removes one failure interface. Applying over gel makes the most sense only when you deliberately accept the tradeoff and the gel is completely sound.
If your reason for layering is simply to preserve nail color for a short event, tabs may sometimes be a lower-commitment experiment than liquid glue, provided the tab maker allows that substrate. If your goal is maximum predictable hold, the cleaner diagnostic path is still to return to the bare, prepared surface specified by the press-on system.
Diagnostic table
| What you see | What it suggests | Next check |
|---|---|---|
| Press-on releases cleanly from intact gel | Top adhesive-to-gel interface failed | Use the manufacturer-supported bare-nail method for maximum predictability |
| Press-on comes off with gel attached | Underlying gel manicure failed | Address/remove compromised gel; do not add stronger glue |
| Shell rocks over the apex | Gel changed the nail geometry | Choose a deeper or more compatible shell |
| Lift starts at an existing gel edge | Pre-existing gel detachment | Do not cover; remove or correct the gel first |
| Same old size suddenly pinches | Overlay changed width or curve | Dry-fit and resize every finger |
A controlled test plan
- 1
Choose one nail with completely intact gel.
- 2
Dry-fit a shell and reject it if the apex creates rocking or pressure.
- 3
Use a conservative test application rather than committing all ten nails.
- 4
If it fails, preserve the layers long enough to identify which interface separated.
- 5
Use that interface—not wear time alone—to decide the next change.
What not to do
- Applying over gel that is already lifting
- Aggressively filing through gel into natural nail
- Assuming old press-on sizes still fit the overlay geometry
- Adding more glue to fill a rocking shell
- Calling every layered failure weak nail glue
Worked troubleshooting example
Nina wanted short press-ons over a two-day-old structured gel manicure. Her usual middle-finger shell rocked because the gel apex contacted its center first.
She switched to a deeper shell and tested only one finger. On another nail she noticed a small pre-existing gel lift and left it uncovered rather than hiding it under a press-on.
The test nail stayed stable, while the skipped nail demonstrated why underlying enhancement integrity has to be checked before changing adhesive strength.
Field notes
A press-on over gel should be treated as a layered assembly. The location of separation after failure often gives a clearer diagnosis than how many days the manicure lasted.
Structured gel is especially likely to change curve matching because even a modest apex can make a rigid press-on bridge the cuticle and free-edge regions.
Frequently asked questions
Should I buff gel before putting on a press-on?
Do not improvise aggressive filing. If you use a layered method at all, preserve the natural nail and follow compatible product instructions.
Will nail glue ruin the gel manicure?
It can complicate removal or pull at a weak gel layer. There is no guarantee the manicure underneath will remain intact.
Is over-gel application better than bare-nail application?
Not for predictability. Bare, properly prepared nail removes an additional interface and matches standard press-on instructions more closely.
Sources checked
Sources below are page-specific. We prioritize manufacturer directions for product-specific steps and use medical or dermatology guidance when a safety question requires it. Always follow the instructions for the exact adhesive or set you own.